在 React 中實現無限滾動和圖像延遲加載
已發表: 2022-03-10HTML Intersection Observer API 在 React 功能組件中實現無限滾動和圖像延遲加載。 在這個過程中,我們將學習如何使用一些 React 的鉤子以及如何創建自定義鉤子。如果您一直在尋找分頁的替代方法,無限滾動是一個很好的考慮。 在本文中,我們將在 React 功能組件的上下文中探索 Intersection Observer API 的一些用例。 讀者應該具備 React 功能組件的工作知識。 對 React 鉤子有一定的了解是有益的,但不是必需的,因為我們將看一些。
我們的目標是,在本文的最後,我們將使用原生 HTML API 實現無限滾動和圖像延遲加載。 我們也會學到更多關於 React Hooks 的東西。 有了它,您可以在必要時在您的 React 應用程序中實現無限滾動和圖像延遲加載。
讓我們開始吧。
使用 React 和 Leaflet 創建地圖
從 CSV 或 JSON 文件中獲取信息不僅複雜,而且乏味。 以視覺輔助的形式表示相同的數據更簡單。 Shajia Abidi 解釋了 Leaflet 工具的強大功能,以及如何創建許多不同類型的地圖。 閱讀相關文章 →
交叉口觀察者 API
根據 MDN 文檔,“Intersection Observer API 提供了一種異步觀察目標元素與祖先元素或頂級文檔視口的交集變化的方法”。
這個 API 允許我們實現一些很酷的功能,例如無限滾動和圖像延遲加載。 通過調用其構造函數並向其傳遞回調和選項對象來創建交叉點觀察器。 只要一個名為target的元素與設備視口或指定的元素(稱為root )相交,就會調用回調。 我們可以在選項參數中指定自定義根或使用默認值。
let observer = new IntersectionObserver(callback, options);該 API 易於使用。 一個典型的例子如下所示:
var intObserver = new IntersectionObserver(entries => { entries.forEach(entry => { console.log(entry) console.log(entry.isIntersecting) // returns true if the target intersects the root element }) }, { // default options } ); let target = document.querySelector('#targetId'); intObserver.observe(target); // start observation entries是IntersectionObserverEntry對象的列表。 IntersectionObserverEntry對象描述了一個觀察到的目標元素的交集變化。 請注意,回調不應處理任何耗時的任務,因為它在主線程上運行。
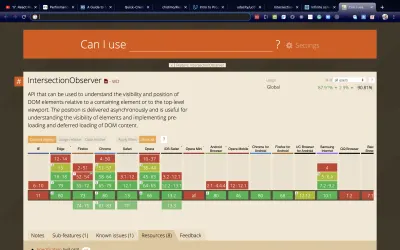
Intersection Observer API 目前享有廣泛的瀏覽器支持,如 caniuse 所示。

您可以在資源部分提供的鏈接中閱讀有關 API 的更多信息。
現在讓我們看看如何在真正的 React 應用程序中使用這個 API。 我們應用程序的最終版本將是一個無限滾動的圖片頁面,並且每個圖片都會延遲加載。
使用useEffect Hook 進行 API 調用
要開始,請從此 URL 克隆啟動項目。 它具有最少的設置和定義的一些樣式。 我還在public/index.html文件中添加了指向Bootstrap的 CSS 的鏈接,因為我將使用它的類進行樣式設置。
如果您願意,請隨意創建一個新項目。 如果你想跟隨 repo,請確保你安裝了yarn包管理器。 您可以在此處找到適用於您的特定操作系統的安裝說明。
對於本教程,我們將從公共 API 中獲取圖片並將其顯示在頁面上。 我們將使用 Lorem Picsum API。
對於本教程,我們將使用端點https://picsum.photos/v2/list?page=0&limit=10 ,它返回圖片對像數組。 為了獲得接下來的十張圖片,我們將 page 的值更改為 1,然後是 2,以此類推。
我們現在將一塊一塊地構建 App 組件。
打開src/App.js並輸入以下代碼。
import React, { useEffect, useReducer } from 'react'; import './index.css'; function App() { const imgReducer = (state, action) => { switch (action.type) { case 'STACK_IMAGES': return { ...state, images: state.images.concat(action.images) } case 'FETCHING_IMAGES': return { ...state, fetching: action.fetching } default: return state; } } const [imgData, imgDispatch] = useReducer(imgReducer,{ images:[], fetching: true}) // next code block goes here } 首先,我們定義了一個 reducer 函數imgReducer 。 這個 reducer 處理兩個動作。
-
STACK_IMAGES動作連接images數組。 -
FETCHING_IMAGES操作在true和false之間切換fetching變量的值。
下一步是將這個減速器連接到一個useReducer鉤子。 完成後,我們會返回兩件事:
-
imgData,其中包含兩個變量:images是圖片對象的數組。fetching是一個布爾值,它告訴我們 API 調用是否正在進行。 -
imgDispatch,這是一個用於更新 reducer 對象的函數。
您可以在 React 文檔中了解有關useReducer掛鉤的更多信息。
代碼的下一部分是我們進行 API 調用的地方。 將以下代碼粘貼到App.js中上一個代碼塊的下方。
// make API calls useEffect(() => { imgDispatch({ type: 'FETCHING_IMAGES', fetching: true }) fetch('https://picsum.photos/v2/list?page=0&limit=10') .then(data => data.json()) .then(images => { imgDispatch({ type: 'STACK_IMAGES', images }) imgDispatch({ type: 'FETCHING_IMAGES', fetching: false }) }) .catch(e => { // handle error imgDispatch({ type: 'FETCHING_IMAGES', fetching: false }) return e }) }, [ imgDispatch ]) // next code block goes here 在useEffect掛鉤中,我們使用fetch API 調用 API 端點。 然後,我們通過調度STACK_IMAGES操作使用 API 調用的結果更新圖像數組。 一旦 API 調用完成,我們還會分派FETCHING_IMAGES操作。
下一個代碼塊定義函數的返回值。 在useEffect掛鉤後輸入以下代碼。
return ( <div className=""> <nav className="navbar bg-light"> <div className="container"> <a className="navbar-brand" href="/#"> <h2>Infinite scroll + image lazy loading</h2> </a> </div> </navv <div id='images' className="container"> <div className="row"> {imgData.images.map((image, index) => { const { author, download_url } = image return ( <div key={index} className="card"> <div className="card-body "> <img alt={author} className="card-img-top" src={download_url} /> </div> <div className="card-footer"> <p className="card-text text-center text-capitalize text-primary">Shot by: {author}</p> </div> </div> ) })} </div> </div> </div> ); 為了顯示圖像,我們在imgData對像中映射圖像數組。
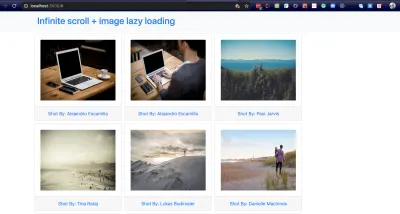
現在啟動應用程序並在瀏覽器中查看頁面。 您應該看到圖像很好地顯示在響應式網格中。
最後一點是導出 App 組件。
export default App; 
此時對應的分支是 01-make-api-calls。
現在讓我們通過在頁面滾動時顯示更多圖片來擴展它。
實現無限滾動
我們的目標是在頁面滾動時呈現更多圖片。 從 API 端點的 URL, https://picsum.photos/v2/list?page=0&limit=10 ,我們知道要獲得一組新照片,我們只需要增加page的值。 當我們的圖片用完時,我們也需要這樣做。 出於我們的目的,當我們點擊頁面底部時,我們會知道我們已經用完了圖像。 是時候看看 Intersection Observer API 如何幫助我們實現這一目標了。
打開src/App.js並在imgReducer pageReducer
// App.js const imgReducer = (state, action) => { ... } const pageReducer = (state, action) => { switch (action.type) { case 'ADVANCE_PAGE': return { ...state, page: state.page + 1 } default: return state; } } const [ pager, pagerDispatch ] = useReducer(pageReducer, { page: 0 }) 我們只定義一種動作類型。 每次觸發ADVANCE_PAGE動作時, page的值都會增加 1。
更新fetch函數中的 URL 以動態接受頁碼,如下所示。
fetch(`https://picsum.photos/v2/list?page=${pager.page}&limit=10`) 將imgData添加到pager.page旁邊的依賴數組中。 這樣做可確保 API 調用在pager.page更改時運行。
useEffect(() => { ... }, [ imgDispatch, pager.page ]) 在 API 調用的useEffect掛鉤之後,輸入以下代碼。 同時更新您的導入行。
// App.js import React, { useEffect, useReducer, useCallback, useRef } from 'react'; useEffect(() => { ... }, [ imgDispatch, pager.page ]) // implement infinite scrolling with intersection observer let bottomBoundaryRef = useRef(null); const scrollObserver = useCallback( node => { new IntersectionObserver(entries => { entries.forEach(en => { if (en.intersectionRatio > 0) { pagerDispatch({ type: 'ADVANCE_PAGE' }); } }); }).observe(node); }, [pagerDispatch] ); useEffect(() => { if (bottomBoundaryRef.current) { scrollObserver(bottomBoundaryRef.current); } }, [scrollObserver, bottomBoundaryRef]); 我們定義了一個變量bottomBoundaryRef並將其值設置為useRef(null) 。 useRef讓變量在組件渲染中保留它們的值,即當包含的組件重新渲染時,變量的當前值仍然存在。 更改其值的唯一方法是重新分配該變量的.current屬性。
在我們的例子中, bottomBoundaryRef.current以null值開始。 隨著頁面渲染週期的進行,我們將其當前屬性設置為節點<div id='page-bottom-boundary'> 。
我們使用賦值語句ref={bottomBoundaryRef}告訴 React 將bottomBoundaryRef.current設置為聲明此賦值的 div。
因此,
bottomBoundaryRef.current = null在渲染週期結束時,變為:
bottomBoundaryRef.current = <div></div>我們馬上就會看到這個任務在哪裡完成。

接下來,我們定義一個scrollObserver函數,在其中設置觀察者。 這個函數接受一個DOM節點來觀察。 這裡要注意的要點是,每當我們到達觀察的交叉路口時,我們都會調度ADVANCE_PAGE動作。 效果是將pager.page的值增加 1。一旦發生這種情況,將其作為依賴項的useEffect掛鉤將重新運行。 這個重新運行,反過來,用新的頁碼調用 fetch 調用。
事件遊行看起來像這樣。
在觀察下命中交叉點→調用ADVANCE_PAGE動作→將pager.page的值增加 1→用於獲取調用運行的useEffect鉤子→運行fetch調用→返回的圖像連接到images數組。
我們在useEffect鉤子中調用scrollObserver ,以便該函數僅在任何鉤子的依賴項發生變化時運行。 如果我們沒有在useEffect掛鉤中調用該函數,該函數將在每個頁面渲染時運行。
回想一下bottomBoundaryRef.current指的是<div id="page-bottom-boundary" style="border: 1px solid red;"></div> 。 在將其傳遞給scrollObserver之前,我們檢查它的值是否不為空。 否則, IntersectionObserver構造函數將返回錯誤。
因為我們在scrollObserver掛鉤中使用了useEffect ,所以我們必須將其包裝在useCallback掛鉤中以防止無休止的組件重新渲染。 您可以在 React 文檔中了解有關 useCallback 的更多信息。
在<div id='images'> div 之後輸入以下代碼。
// App.js <div id='image'> ... </div> {imgData.fetching && ( <div className="text-center bg-secondary m-auto p-3"> <p className="m-0 text-white">Getting images</p> </div> )} <div id='page-bottom-boundary' style={{ border: '1px solid red' }} ref={bottomBoundaryRef}></div> 當 API 調用開始時,我們將fetching設置為true ,並且文本Getting images變得可見。 完成後,我們將fetching設置為false ,文本被隱藏。 我們還可以通過在構造函數選項對像中設置不同的threshold ,在準確到達邊界之前觸發 API 調用。 最後的紅線讓我們準確地看到我們何時到達頁面邊界。
此時對應的分支是02-infinite-scroll。
我們現在將實現圖像延遲加載。
實現圖像延遲加載
如果您在向下滾動時檢查網絡選項卡,您會看到,一旦您點擊紅線(底部邊界),就會發生 API 調用,並且即使您還沒有查看,所有圖像也會開始加載他們。 這可能不是理想的行為有多種原因。 我們可能希望保存網絡調用,直到用戶想要查看圖像。 在這種情況下,我們可以選擇延遲加載圖像,即在圖像滾動到視圖之前我們不會加載圖像。
打開src/App.js 。 在無限滾動功能下方,輸入以下代碼。
// App.js // lazy loads images with intersection observer // only swap out the image source if the new url exists const imagesRef = useRef(null); const imgObserver = useCallback(node => { const intObs = new IntersectionObserver(entries => { entries.forEach(en => { if (en.intersectionRatio > 0) { const currentImg = en.target; const newImgSrc = currentImg.dataset.src; // only swap out the image source if the new url exists if (!newImgSrc) { console.error('Image source is invalid'); } else { currentImg.src = newImgSrc; } intObs.unobserve(node); // detach the observer when done } }); }) intObs.observe(node); }, []); useEffect(() => { imagesRef.current = document.querySelectorAll('.card-img-top'); if (imagesRef.current) { imagesRef.current.forEach(img => imgObserver(img)); } }, [imgObserver, imagesRef, imgData.images]); 與scrollObserver ,我們定義了一個函數imgObserver ,它接受一個要觀察的節點。 當頁面遇到由en.intersectionRatio > 0確定的交叉點時,我們交換元素上的圖像源。 請注意,在進行交換之前,我們首先檢查新圖像源是否存在。 與scrollObserver函數一樣,我們將 imgObserver 包裝在useCallback掛鉤中,以防止無休止的組件重新渲染。
另請注意,一旦完成替換,我們就會停止觀察img元素。 我們使用unobserve方法來做到這一點。
在下面的useEffect鉤子中,我們使用document.querySelectorAll抓取頁面上所有具有.card-img-top類的圖像。 然後我們遍歷每個圖像並在其上設置一個觀察者。
請注意,我們添加了imgData.images作為useEffect掛鉤的依賴項。 當這種變化時,它會觸發useEffect鉤子,然後imgObserver會被每個<img className='card-img-top'>元素調用。
如下所示更新<img className='card-img-top'/>元素。
<img alt={author} data-src={download_url} className="card-img-top" src={'https://picsum.photos/id/870/300/300?grayscale&blur=2'} /> 我們為每個<img className='card-img-top'/>元素設置一個默認來源,並將我們想要顯示的圖像存儲在data-src屬性中。 默認圖像通常具有較小的尺寸,以便我們盡可能少地下載。 當<img/>元素出現時, data-src屬性的值將替換默認圖像。
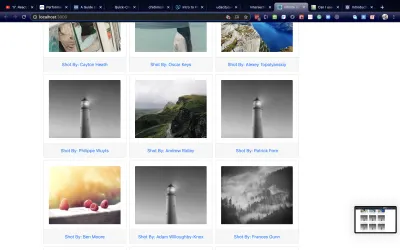
在下圖中,我們看到默認的燈塔圖像仍顯示在某些空間中。

此時對應的分支是03-lazy-loading。
現在讓我們看看我們如何抽象所有這些函數,以便它們可以重用。
將 Fetch、無限滾動和延遲加載抽像到自定義 Hooks 中
我們已經成功實現了 fetch、無限滾動和圖像延遲加載。 我們的應用程序中可能有另一個組件需要類似的功能。 在這種情況下,我們可以抽象和重用這些函數。 我們所要做的就是將它們移動到一個單獨的文件中,然後將它們導入我們需要的地方。 我們想把它們變成自定義鉤子。
React 文檔將自定義 Hook 定義為名稱以"use"開頭的 JavaScript 函數,並且可以調用其他鉤子。 在我們的例子中,我們想要創建三個鉤子, useFetch 、 useInfiniteScroll 、 useLazyLoading 。
在src/文件夾中創建一個文件。 將其命名為customHooks.js並將下面的代碼粘貼到其中。
// customHooks.js import { useEffect, useCallback, useRef } from 'react'; // make API calls and pass the returned data via dispatch export const useFetch = (data, dispatch) => { useEffect(() => { dispatch({ type: 'FETCHING_IMAGES', fetching: true }); fetch(`https://picsum.photos/v2/list?page=${data.page}&limit=10`) .then(data => data.json()) .then(images => { dispatch({ type: 'STACK_IMAGES', images }); dispatch({ type: 'FETCHING_IMAGES', fetching: false }); }) .catch(e => { dispatch({ type: 'FETCHING_IMAGES', fetching: false }); return e; }) }, [dispatch, data.page]) } // next code block here useFetch鉤子接受一個調度函數和一個數據對象。 調度函數將來自 API 調用的數據傳遞給App組件,而數據對象讓我們更新 API 端點 URL。
// infinite scrolling with intersection observer export const useInfiniteScroll = (scrollRef, dispatch) => { const scrollObserver = useCallback( node => { new IntersectionObserver(entries => { entries.forEach(en => { if (en.intersectionRatio > 0) { dispatch({ type: 'ADVANCE_PAGE' }); } }); }).observe(node); }, [dispatch] ); useEffect(() => { if (scrollRef.current) { scrollObserver(scrollRef.current); } }, [scrollObserver, scrollRef]); } // next code block here useInfiniteScroll鉤子接受一個scrollRef和一個dispatch函數。 scrollRef幫助我們設置觀察者,正如我們在實現它的部分中已經討論的那樣。 dispatch 函數提供了一種方法來觸發更新 API 端點 URL 中的頁碼的操作。
// lazy load images with intersection observer export const useLazyLoading = (imgSelector, items) => { const imgObserver = useCallback(node => { const intObs = new IntersectionObserver(entries => { entries.forEach(en => { if (en.intersectionRatio > 0) { const currentImg = en.target; const newImgSrc = currentImg.dataset.src; // only swap out the image source if the new url exists if (!newImgSrc) { console.error('Image source is invalid'); } else { currentImg.src = newImgSrc; } intObs.unobserve(node); // detach the observer when done } }); }) intObs.observe(node); }, []); const imagesRef = useRef(null); useEffect(() => { imagesRef.current = document.querySelectorAll(imgSelector); if (imagesRef.current) { imagesRef.current.forEach(img => imgObserver(img)); } }, [imgObserver, imagesRef, imgSelector, items]) } useLazyLoading鉤子接收一個選擇器和一個數組。 選擇器用於查找圖像。 數組中的任何更改都會觸發useEffect掛鉤,該掛鉤會在每個圖像上設置觀察者。
我們可以看到它與我們在src/App.js中的功能相同,我們已將其提取到一個新文件中。 現在的好處是我們可以動態地傳遞參數。 現在讓我們在 App 組件中使用這些自定義鉤子。
打開src/App.js 。 導入自定義鉤子並刪除我們為獲取數據、無限滾動和圖像延遲加載定義的函數。 留下 reducer 和我們使用useReducer的部分。 粘貼下面的代碼。
// App.js // import custom hooks import { useFetch, useInfiniteScroll, useLazyLoading } from './customHooks' const imgReducer = (state, action) => { ... } // retain this const pageReducer = (state, action) => { ... } // retain this const [pager, pagerDispatch] = useReducer(pageReducer, { page: 0 }) // retain this const [imgData, imgDispatch] = useReducer(imgReducer,{ images:[], fetching: true }) // retain this let bottomBoundaryRef = useRef(null); useFetch(pager, imgDispatch); useLazyLoading('.card-img-top', imgData.images) useInfiniteScroll(bottomBoundaryRef, pagerDispatch); // retain the return block return ( ... ) 我們已經在無限滾動部分討論了bottomBoundaryRef 。 我們將pager對象和imgDispatch函數傳遞給useFetch 。 useLazyLoading接受類名.card-img-top 。 注意. 包含在類名中。 通過這樣做,我們不需要指定它document.querySelectorAll 。 useInfiniteScroll接受 ref 和 dispatch 函數來增加page的值。
此時對應的分支是04-custom-hooks。
結論
HTML 在提供漂亮的 API 來實現很酷的特性方面做得越來越好。 在這篇文章中,我們已經看到在 React 功能組件中使用交集觀察器是多麼容易。 在這個過程中,我們學習瞭如何使用 React 的一些鉤子,以及如何編寫自己的鉤子。
資源
- “無限滾動 + 圖像延遲加載”,Orji Chidi Matthew,GitHub
- “無限滾動、分頁或“加載更多”按鈕? 電子商務中的可用性調查結果,”Christian Holst,Smashing Magazine
- “Lorem Picsum”,大衛·馬比和 Nijiko Yonskai
- “IntersectionObserver 的出現”,Surma,Web Fundamentals
- 我可以使用...
IntersectionObserver - “Intersection Observer API”,MDN 網絡文檔
- “組件和道具”,反應
- “
useCallback”,反應 - “
useReducer”,反應
