你應該嘗試的 7 種很棒的 CSS3 技術
已發表: 2020-02-26CSS(層疊樣式表)與 HTML 的發展令人難以置信。 最近引入了許多功能,例如 Flexbox、CSS Grid 和 CSS 自定義屬性。
它的不斷進步和巨大的潛力是吸引開發人員嘗試新的 CSS 技術並超越它所能做的界限的原因。 HTML 5 和 CSS3 技術的結合無疑是一個閃存殺手。
難怪一個執行良好的 CSS 計劃幾乎可以控制設計的任何方面並帶來更好的用戶體驗,這是非常必要的。 畢竟,當訪問者通過筆記本電腦、台式機、平板電腦或任何其他媒體查看您的網站時,他們會有一定的期望。
但是流行的 CSS 技術是什麼? 當我們談論設計一個有吸引力的用戶友好型網站時,這不是一個明顯的問題嗎?
這就是為什麼我們提出了一些新的 CSS 技術和技巧來掌握你的網頁設計技能。 每一個都包含一些解釋和示例代碼片段。
所以讓我們直接開始吧!
1. 與 Flexbox 垂直對齊
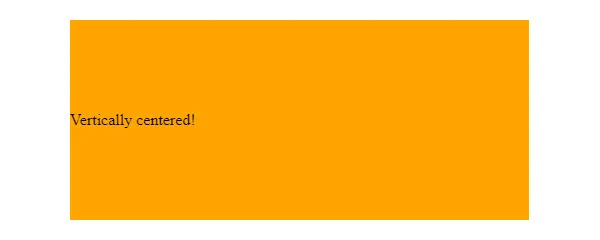
早期的開發人員在將文本或任何其他元素垂直居中對齊時會遇到很多困難。 但是現在,在引入了新的 CSS3 規範Flexbox 之後,事情變得容易多了。
屬性display: flex為用戶提供了一種在中心對齊任何文本或元素的輕鬆方式。 這是示例代碼!
HTML:
<div class="align-vertically">
Vertically centered!
</div>
CSS:
.align-vertically {
  background: #FFA500;
  color: #hhh;
  display: flex;
  align-items: center;
  height: 200px;
}
在上面的 CSS 代碼中, display: flex 描述了元素的 Flexbox 佈局,而 align-items: center; 負責文本的垂直居中。
結果:
2. 響應式 CSS 網格
不要讓您的網格成為例外,使其也像您設計中的其他所有內容一樣響應。
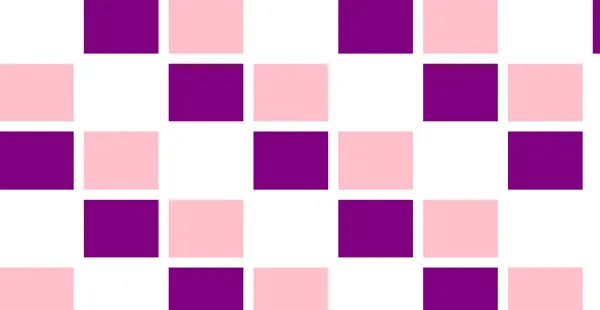
有很多方法可以讓你的網格響應 CSS Grid。 使用它的最佳部分是,無論設備尺寸如何,您都可以創建更靈活的網格,為您提供所需的外觀。
除此之外,CSS 網格還允許您使用不等和相等的列大小。 這是一項很棒的技術,包含多種選項,讓用戶可以自由控制他們的設計。
您可以使用各種斷點、多個維度的高度以及做其他放置,如下例所示。
HTML:
 <div class="grid">
  <div class="grid-item"></div>
  <div class="grid-item"></div>
  <div class="grid-item"></div>
  <div class="grid-item"></div>
  <div class="grid-item"></div>
  <div class="grid-item"></div>
  <div class="grid-item"></div>
  <div class="grid-item"></div>
  <div class="grid-item"></div>
  <div class="grid-item"></div>
  <div class="grid-item"></div>
  <div class="grid-item"></div>
  <div class="grid-item"></div>
  <div class="grid-item"></div>
  <div class="grid-item"></div>
  <div class="grid-item"></div>
  <div class="grid-item"></div>
  <div class="grid-item"></div>
  <div class="grid-item"></div>
  <div class="grid-item"></div>
  <div class="grid-item"></div>
  <div class="grid-item"></div>
  <div class="grid-item"></div>
  <div class="grid-item"></div>
  <div class="grid-item"></div>
  <div class="grid-item"></div>
  <div class="grid-item"></div>
  <div class="grid-item"></div>
  <div class="grid-item"></div>
  <div class="grid-item"></div>
  <div class="grid-item"></div>
  <div class="grid-item"></div>
  <div class="grid-item"></div>
  <div class="grid-item"></div>
  <div class="grid-item"></div>
  <div class="grid-item"></div>
</div>
CSS:
.grid
 {
  display: grid;
  grid-template-rows: repeat(5, 1fr);
  grid-auto-columns: calc((100vh - 3em) / 4);
  grid-auto-flow: column;
  grid-gap: 1em;
  height: 100vh;
}
.grid-item:nth-child(3n)
 {
  background-color: purple;
}
.grid-item:nth-child(3n + 2)
{
  background-color: pink;
}
上述 CSS 代碼中使用的分數單位 (fr) 是根據您的指南分隔開放空間的靈活單位。 每個 fr 語句都針對列,然後您可以將間隙相加並準備好網格。
結果:
3.文字動畫
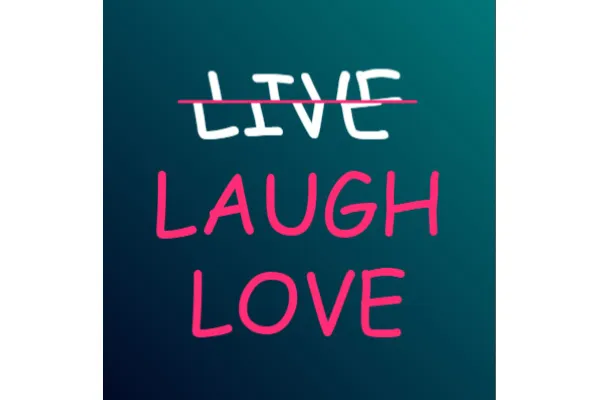
您可能已經使用 CSS 創建了背景動畫,但現在它也會影響用戶如何與網站的文本元素進行交互和互動。 從懸停調整到讓文字漂浮在空中,CCS3 讓這一切成為可能。
沒有很多吸引用戶的元素的網站可以充分利用這一特點。 這是一個小例子。
HTML:
<div class="Menu">
<ul class="Menu-list" data-offset="10">
<li class="Menu-list-item" data-offset="20" onclick>
LIVE
<span class="Mask"><span>LIVE</span></span>
<span class="Mask"><span>LIVE</span></span>
</li>
<li class="Menu-list-item" data-offset="16" onclick>
LAUGH
<span class="Mask"><span>LAUGH</span></span>
<span class="Mask"><span>LAUGH</span></span>
</li>
<li class="Menu-list-item" data-offset="12" onclick>
LOVE
<span class="Mask"><span>LOVE</span></span>
<span class="Mask"><span>LOVE</span></span>
</ul>
</div>
CSS:
$perspective:     60rem;
$font-size:       5.25rem;
$split-position:  50%;
$split-thickness: 3px;
$split-color:     #FF2C75;
%font-settings {
font-family: "Comic Sans MS", system-ui, sans-serif;
font-style: normal;
font-weight: normal;
-webkit-font-smoothing: antialiased;
-webkit-font-kerning: normal;
-webkit-text-size-adjust: 100%;
}
html,
body {
  width: 100vw;
  height: 100vh;
}
body {
  @extend %font-settings;
  background: linear-gradient(45deg, #02001F,#008080);
  transform-style: preserve-3d;
  transform: perspective($perspective);
  position: fixed;
  display: flex;
  align-items: center;
  justify-content: center;
}
.Menu-list {
  font-size: $font-size;
  line-height: 1.2;
  text-transform: uppercase;
  text-align: center;
  display: flex;
  flex-direction: column;
  align-items: center;
  transform: rotateX(-10deg) rotateY(20deg); // overwritten by JS
}
.Menu-list-item {
  position: relative;
  color: transparent;
  cursor: pointer;
  &::before {
    content: '';
    display: block;
    position: absolute;
    top: $split-position;
    left: -10%;
    right: -10%;
    height: $split-thickness;
    border-radius: $split-thickness;
    margin-top: -($split-thickness / 2);
    background: $split-color;
    transform: scale(0);
    transition: transform .8s cubic-bezier(.16,1.08,.38,.98);
    z-index: 1;
  }
}
.Mask {
  display: block;
  position: absolute;
  overflow: hidden;
  color: $split-color;
  top: 0;
  height: $split-position;
  transition: all .8s cubic-bezier(.16,1.08,.38,.98);
  span { display: block; }
}
.Mask + .Mask {
  top: $split-position - 0.1;
  height: 100 - $split-position + 0.1;
  span { transform: translateY(-$split-position); }
}
.Menu-list-item:hover,
.Menu-list-item:active {
  .Mask { color: #FFF; transform: skewX(12deg) translateX(5px); }
  .Mask + .Mask { transform: skewX(12deg) translateX(-5px); }
  &::before { transform: scale(1); }
}
像這樣,您還可以為您的網站創建多個動態文本元素。 不是很有趣嗎?
結果:

4.列佈局
通常,基於列的佈局是使用 Javascript 創建的,這非常複雜且耗時。 但是 CSS 帶來了一種方法來減輕開發人員和網頁設計師的任務。
以下是 CSS 列規則,您可以通過它為您的網站製作基於列的佈局。
HTML:
<div class="container">
Place a container component in order to start building the format. Sometimes you may be able to get rid of the container later, but getting the container component makes it easier to handle across different web browsers for most fixed-width layouts. It defines how wide the content of the web page will be, as well as any external margins and inside padding.
</div>
CSS:
.container {
  /* Old Chrome, Safari and Opera */
  -webkit-column-count: 3;
  -webkit-column-gap: 40px;
  -webkit-column-rule-style: solid;
  -webkit-column-rule-width: 4px;
  -webkit-column-rule-color: orange;
  /* Old Firefox */
  -moz-column-count: 3;
  -moz-column-gap: 40px;
  -moz-column-rule-style: solid;
  -moz-column-rule-width: 4px;
  -moz-column-rule-color: orange;
  /* Standard syntax */
  column-count: 3;
  column-gap: 40px;
  column-rule-style: solid;
  column-rule-width: 4px;
  column-rule-color: orange;
}
結果:

5. 屏幕方向
許多人認為屏幕方向和設備方向都是出於相同的目的。 但事實並非如此。 屏幕的方向與設備有點不同。
即使設備無法檢測其方向,屏幕也始終可以。 如果設備也有能力,那麼最好控制屏幕方向,以便您可以維護或更改網站的界面。
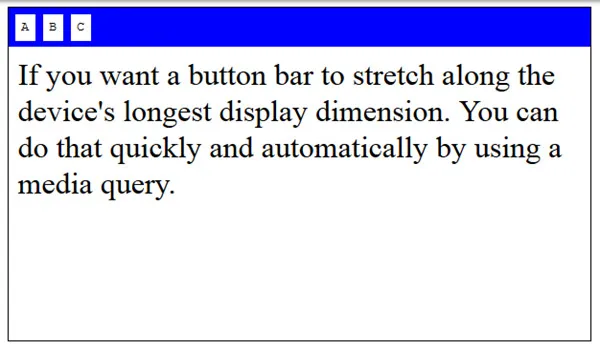
有兩種方法可以處理屏幕方向; CSS 或 Javascript。 但是,當您使用 CSS Orientation Media Query 時,這很容易。 因為它使內容能夠調整其格式,無論瀏覽器窗口是處於橫向模式還是縱向模式。 為了更好地理解,讓我們看下面的例子。
HTML:
<ul id="toolbar">
  <li>A</li>
  <li>B</li>
  <li>C</li>
</ul>
<p>If you want a button bar to stretch along the device's longest display dimension. You can do that quickly and automatically by using a media query.</p>
zzzzz
CSS:
/* First let's define some common styles */

html, body {
  width : 100%;
  height: 100%;
}

body {
  border: 1px solid black;

  -moz-box-sizing: border-box;
  box-sizing: border-box;
}

p {
  font   : 1em sans-serif;
  margin : 0;
  padding: .5em;
}

ul {
  list-style: none;

  font   : 1em monospace;
  margin : 0;
  padding: .5em;

  -moz-box-sizing: border-box;
  box-sizing: border-box;

  background: black;
}

li {
  display: inline-block;
  margin : 0;
  padding: 0.5em;
  background: white;
}
/* For portrait, we want the toolbar on top */

@media screen and (orientation: portrait) {
  #toolbar {
    width: 100%;
  }
}

/* For landscape, we want the toolbar stick on the left */

@media screen and (orientation: landscape) {
  #toolbar {
    position: fixed;
    width: 2.65em;
    height: 100%;
  }

  p {
    margin-left: 2em;
  }

  li + li {
    margin-top: .5em;
  }
}
結果:
6.逗號分隔列表
毫無疑問,項目符號列表在書面形式中非常常用,可以更準確、更清晰地傳達任何信息。 但是大多數人都在努力解決的一件事是在列表的每一點上添加逗號。
使用下面提到的代碼片段,您可以輕鬆地在列表中添加逗號,最後一個除外。
HTML:
<ul>
  <li>Apple</li>
  <li>Pineapple</li>
  <li>Custard Apple </li>
</ul>
CSS:
body{
  font-family: Arial;
  font-size:30px;
}

ul > li:not(:last-child)::after {
  content: ",";
}
結果:

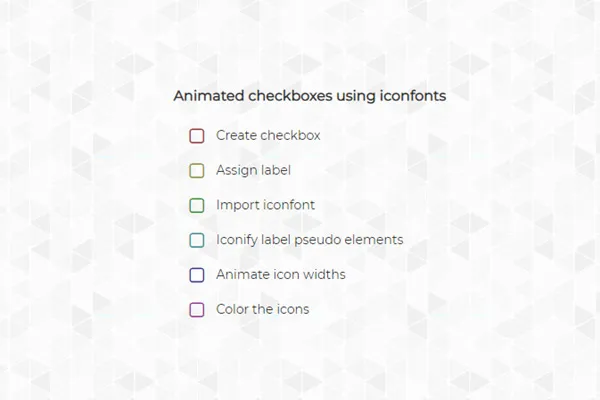
7.動畫複選框
好吧,大多數人都非常了解 CSS 背景和文本動畫。 但是,沒有多少人知道複選框動畫。
是的,除了背景和文本之外,您還可以使您的複選框部分看起來很吸引人。 不是很棒嗎?
以下是您可以參考的示例:
HTML:
<h1>Animated checkboxes using iconfonts</h1>
<!-- A list of checkboxes -->
<ul>
	<li>
		<input type="checkbox" name="one" id="one" />
		<label for="one">Create checkbox</label>
	</li>
	<li>
		<input type="checkbox" name="two" id="two" />
		<label for="two">Assign label</label>
	</li>
	<li>
		<input type="checkbox" name="three" id="three" />
		<label for="three">Import iconfont</label>
	</li>
	<li>
		<input type="checkbox" name="four" id="four" />
		<label for="four">Iconify label pseudo elements</label>
	</li>
	<li>
		<input type="checkbox" name="five" id="five" />
		<label for="five">Animate icon widths</label>
	</li>
	<li>
		<input type="checkbox" name="six" id="six" />
		<label for="six">Color the icons</label>
	</li>
</ul>
CSS:
@import
(import 2 fonts one or heading and other for text)
h1 {
	font-size: 15;
	padding: 12px;
	text-align: center;
}
ul {
	width: 290px;
	margin: 0 auto;
}
ul li {
	list-style-type: none;
	padding: 10px;
}

/*Adding custom checkbox icons*/
label {
	position: relative;
	padding-left: 30px;
	font-size: 14px;
	cursor: pointer;
}
label:before, label:after {
	font-family: FontAwesome;
	font-size: 21px;
	/*absolutely positioned*/
	position: absolute; top: 0; left: 0;
}
label:before {
	content: '\f096'; /*unchecked*/
}
label:after {
	content: '\f046'; /*checked*/
	/*checked icon will be hidden by default by using 0 max-width and overflow hidden*/
	max-width: 0;
	overflow: hidden;
	opacity: 0.5;
	/*CSS3 transitions for animated effect*/
	transition: all 0.35s;
}

/*hiding the original checkboxes*/
input[type="checkbox"] {
	display: none;
}
/*when the user checks the checkbox the checked icon will animate in*/
input[type="checkbox"]:checked + label:after {
	max-width: 25px; /*an arbitratry number more than the icon's width*/
	opacity: 1; /*for fade in effect*/
}

/*adding some colors for fun*/
#one+label:before, #one+label:after {color: hsl(0, 45%, 40%);}
#two+label:before, #two+label:after {color: hsl(60, 45%, 40%);}
#three+label:before, #three+label:after {color: hsl(120, 45%, 40%);}
#four+label:before, #four+label:after {color: hsl(180, 45%, 40%);}
#five+label:before, #five+label:after {color: hsl(240, 45%, 40%);}
#six+label:before, #six+label:after {color: hsl(300, 45%, 40%);}
結果:
包裝詞:
如果我們深入下去,那麼 CSS 和 HTML 的可能性是無窮無盡的。 因此,我們希望上述實現的技術可以幫助您獲得一些知識,並有助於您設計一個出色的網站。
