
如何在虚拟现实中构建无尽的跑步游戏(第 2 部分)
已发表: 2022-03-10在本系列的第 1 部分中,我们了解了如何创建具有照明和动画效果的虚拟现实模型。 在这部分,我们将实现游戏的核心逻辑,并利用更高级的 A-Frame 环境操作来构建这个应用程序的“游戏”部分。 到最后,您将拥有一款功能强大且具有真正挑战的虚拟现实游戏。
本教程涉及多个步骤,包括(但不限于)碰撞检测和更多 A-Frame 概念,例如 mixin。
- 最终产品的演示
先决条件
就像在上一个教程中一样,您将需要以下内容:
- 互联网访问(特别是 glitch.com);
- 从第 1 部分完成的 Glitch 项目。(您可以通过导航到 https://glitch.com/edit/#!/ergo-1 并单击“Remix to edit”从完成的产品继续;
- 虚拟现实耳机(可选,推荐)。 (我使用 Google Cardboard,每张 15 美元。)
第 1 步:设计障碍
在此步骤中,您将设计我们将用作障碍物的树。 然后,您将添加一个简单的动画,将树木移向玩家,如下所示:

这些树将作为您在游戏中生成的障碍的模板。 对于这一步的最后一部分,我们将删除这些“模板树”。
首先,添加一些不同的 A-Frame mixins 。 Mixin 是常用的组件属性集。 在我们的例子中,我们所有的树都将具有相同的颜色、高度、宽度、深度等。换句话说,你所有的树看起来都一样,因此将使用一些共享的 mixin。
注意:在我们的教程中,您唯一的资产将是 mixins。 访问 A-Frame Mixins 页面了解更多信息。
在您的编辑器中,导航到index.html 。 在天空之后和灯光之前,添加一个新的 A-Frame 实体来保存您的资产:
<a-sky...></a-sky> <!-- Mixins --> <a-assets> </a-assets> <!-- Lights --> ... 在您的新a-assets实体中,首先为您的植物添加一个 mixin。 这个 mixins 定义了模板树的叶子的通用属性。 简而言之,它是一个白色的平底金字塔,用于低多边形效果。
<a-assets> <a-mixin geometry=" primitive: cone; segments-height: 1; segments-radial:4; radius-bottom:0.3;" material="color:white;flat-shading: true;"></a-mixin> </a-assets>在你的树叶混合下面,为树干添加一个混合。 这个树干将是一个小的白色矩形棱柱。
<a-assets> ... <a-mixin geometry=" primitive: box; height:0.5; width:0.1; depth:0.1;" material="color:white;"></a-mixin> </a-assets>接下来,添加将使用这些 mixin 的模板树对象。 仍在index.html中,向下滚动到平台部分。 在播放器部分之前,添加一个新的树部分,其中包含三个空树实体:
<a-entity ...> <!-- Trees --> <a-entity></a-entity> <a-entity></a-entity> <a-entity></a-entity> <!-- Player --> ...接下来,重新定位、重新缩放树实体并添加阴影。
<!-- Trees --> <a-entity shadow scale="0.3 0.3 0.3" position="0 0.6 0"></a-entity> <a-entity shadow scale="0.3 0.3 0.3" position="0 0.6 0"></a-entity> <a-entity shadow scale="0.3 0.3 0.3" position="0 0.6 0"></a-entity>现在,使用我们之前定义的 mixin,用树干和树叶填充树实体。
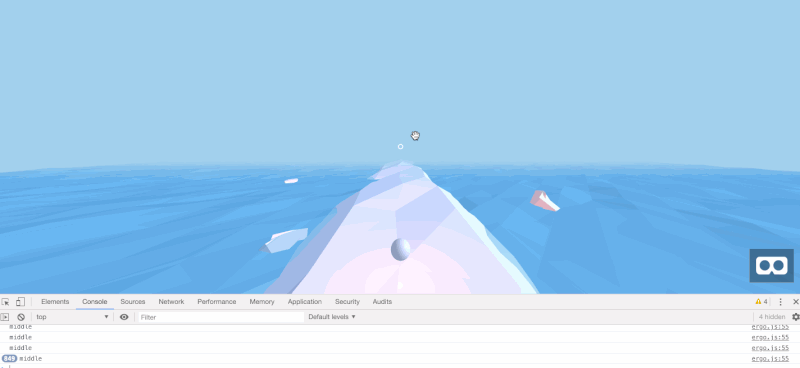
<!-- Trees --> <a-entity ...> <a-entity mixin="foliage"></a-entity> <a-entity mixin="trunk" position="0 -0.5 0"></a-entity> </a-entity> <a-entity ...> <a-entity mixin="foliage"></a-entity> <a-entity mixin="trunk" position="0 -0.5 0"></a-entity> </a-entity> <a-entity ...> <a-entity mixin="foliage"></a-entity> <a-entity mixin="trunk" position="0 -0.5 0"></a-entity> </a-entity>导航到您的预览,您现在应该会看到以下模板树。

现在,让树木从平台上的远处位置向用户移动。 和以前一样,使用a-animation标签:
<!-- Trees --> <a-entity ...> ... <a-animation attribute="position" ease="linear" from="0 0.6 -7" to="0 0.6 1.5" dur="5000"></a-animation> </a-entity> <a-entity ...> ... <a-animation attribute="position" ease="linear" from="-0.5 0.55 -7" to="-0.5 0.55 1.5" dur="5000"></a-animation> </a-entity> <a-entity ...> ... <a-animation attribute="position" ease="linear" from="0.5 0.55 -7" to="0.5 0.55 1.5" dur="5000"></a-animation> </a-entity>确保您的代码与以下内容匹配。
<a-entity...> <!-- Trees --> <a-entity shadow scale="0.3 0.3 0.3" position="0 0.6 0"> <a-entity mixin="foliage"></a-entity> <a-entity mixin="trunk" position="0 -0.5 0"></a-entity> <a-animation attribute="position" ease="linear" from="0 0.6 -7" to="0 0.6 1.5" dur="5000"></a-animation> </a-entity> <a-entity shadow scale="0.3 0.3 0.3" position="-0.5 0.55 0"> <a-entity mixin="foliage"></a-entity> <a-entity mixin="trunk" position="0 -0.5 0"></a-entity> <a-animation attribute="position" ease="linear" from="-0.5 0.55 -7" to="-0.5 0.55 1.5" dur="5000"></a-animation> </a-entity> <a-entity shadow scale="0.3 0.3 0.3" position="0.5 0.55 0"> <a-entity mixin="foliage"></a-entity> <a-entity mixin="trunk" position="0 -0.5 0"></a-entity> <a-animation attribute="position" ease="linear" from="0.5 0.55 -7" to="0.5 0.55 1.5" dur="5000"></a-animation> </a-entity> <!-- Player --> ...导航到您的预览,您现在将看到树木向您移动。
导航回您的编辑器。 这一次,选择assets/ergo.js 。 在游戏部分,在窗口加载后设置树。
/******** * GAME * ********/ ... window.onload = function() { setupTrees(); } 在控件下方但在 Game 部分之前,添加一个新的TREES部分。 在本节中,定义一个新的setupTrees函数。
/************ * CONTROLS * ************/ ... /********* * TREES * *********/ function setupTrees() { } /******** * GAME * ********/ ... 在新的setupTrees函数中,获取对模板树 DOM 对象的引用,并使引用全局可用。
/********* * TREES * *********/ var templateTreeLeft; var templateTreeCenter; var templateTreeRight; function setupTrees() { templateTreeLeft = document.getElementById('template-tree-left'); templateTreeCenter = document.getElementById('template-tree-center'); templateTreeRight = document.getElementById('template-tree-right'); } 接下来,定义一个新的removeTree实用程序。 使用此实用程序,您可以从场景中删除模板树。 在setupTrees函数下,定义您的新实用程序。
function setupTrees() { ... } function removeTree(tree) { tree.parentNode.removeChild(tree); } 回到setupTrees ,使用新实用程序删除模板树。
function setupTrees() { ... removeTree(templateTreeLeft); removeTree(templateTreeRight); removeTree(templateTreeCenter); }确保您的树和游戏部分与以下内容匹配:
/********* * TREES * *********/ var templateTreeLeft; var templateTreeCenter; var templateTreeRight; function setupTrees() { templateTreeLeft = document.getElementById('template-tree-left'); templateTreeCenter = document.getElementById('template-tree-center'); templateTreeRight = document.getElementById('template-tree-right'); removeTree(templateTreeLeft); removeTree(templateTreeRight); removeTree(templateTreeCenter); } function removeTree(tree) { tree.parentNode.removeChild(tree); } /******** * GAME * ********/ setupControls(); // TODO: AFRAME.registerComponent has to occur before window.onload? window.onload = function() { setupTrees(); }重新打开您的预览,您的树现在应该不存在了。 预览应该与本教程开始时的游戏相匹配。
模板树设计到此结束。
在这一步中,我们介绍并使用了 A-Frame mixins,它允许我们通过定义通用属性来简化代码。 此外,我们利用 A-Frame 与 DOM 的集成从 A-Frame VR 场景中移除对象。
在下一步中,我们将生成多个障碍物并设计一个简单的算法来将树木分布在不同的车道上。
第 2 步:产卵障碍
在无尽的跑步游戏中,我们的目标是避开飞向我们的障碍物。 在这个特定的游戏实现中,我们使用最常见的三个车道。
与大多数无尽的跑步游戏不同,该游戏仅支持左右移动。 这对我们生成障碍物的算法施加了限制:我们不能在所有三个车道上同时有三个障碍物飞向我们。 如果发生这种情况,玩家的生存机会将为零。 因此,我们的生成算法需要适应这个约束。
在这一步中,我们所有的代码编辑都将在assets/ergo.js中进行。 HTML 文件将保持不变。 导航到assets/ergo.js的TREES部分。
首先,我们将添加实用程序来生成树。 每棵树都需要一个唯一的 ID,我们将天真地定义为生成树时存在的树的数量。 首先跟踪全局变量中的树数。
/********* * TREES * *********/ ... var numberOfTrees = 0; function setupTrees() { ... 接下来,我们将初始化对树容器 DOM 元素的引用,我们的 spawn 函数将向其中添加树。 仍然在TREES部分,添加一个全局变量,然后进行引用。
... var treeContainer; var numberOfTrees ... function setupTrees() { ... templateTreeRight = ... treeContainer = document.getElementById('tree-container'); removeTree(...); ... }使用树的数量和树容器,编写一个生成树的新函数。

function removeTree(tree) { ... } function addTree(el) { numberOfTrees += 1; el.id = 'tree-' + numberOfTrees; treeContainer.appendChild(el); } ... 为了以后易于使用,您将创建第二个函数,将正确的树添加到正确的车道。 首先,在TREES部分定义一个新的templates数组。
var templates; var treeContainer; ... function setupTrees() { ... templates = [templateTreeLeft, templateTreeCenter, templateTreeRight]; removeTree(...); ... }使用此模板数组,添加一个在特定车道中生成树的实用程序,给定一个表示左、中或右的 ID。
function function addTree(el) { ... } function addTreeTo(position_index) { var template = templates[position_index]; addTree(template.cloneNode(true)); } 导航到您的预览版,然后打开您的开发者控制台。 在您的开发者控制台中,调用全局addTreeTo函数。
> addTreeTo(0); # spawns tree in left lane 
addTreeTo (大预览)现在,您将编写一个随机生成树的算法:
- 随机选择一条车道(对于这个时间步,尚未选择);
- 以一定的概率生成一棵树;
- 如果在此时间步中已生成最大数量的树,请停止。 否则,重复步骤 1。
为了实现该算法,我们将改组模板列表并一次处理一个。 首先定义一个新函数addTreesRandomly ,它接受许多不同的关键字参数。
function addTreeTo(position_index) { ... } /** * Add any number of trees across different lanes, randomly. **/ function addTreesRandomly( { probTreeLeft = 0.5, probTreeCenter = 0.5, probTreeRight = 0.5, maxNumberTrees = 2 } = {}) { } 在您的新addTreesRandomly函数中,定义模板树列表,然后打乱该列表。
function addTreesRandomly( ... ) { var trees = [ {probability: probTreeLeft, position_index: 0}, {probability: probTreeCenter, position_index: 1}, {probability: probTreeRight, position_index: 2}, ] shuffle(trees); } 向下滚动到文件底部,并创建一个新的实用程序部分,以及一个新的shuffle实用程序。 此实用程序将在适当位置随机播放数组。
/******** * GAME * ********/ ... /************* * UTILITIES * *************/ /** * Shuffles array in place. * @param {Array} a items An array containing the items. */ function shuffle(a) { var j, x, i; for (i = a.length - 1; i > 0; i--) { j = Math.floor(Math.random() * (i + 1)); x = a[i]; a[i] = a[j]; a[j] = x; } return a; } 导航回 Trees 部分中的addTreesRandomly函数。 添加一个新变量numberOfTreesAdded并遍历上面定义的树列表。
function addTreesRandomly( ... ) { ... var numberOfTreesAdded = 0; trees.forEach(function (tree) { }); } 在对树的迭代中,仅以某种概率生成一棵树,并且仅当添加的树的数量不超过2时。 如下更新 for 循环。
function addTreesRandomly( ... ) { ... trees.forEach(function (tree) { if (Math.random() < tree.probability && numberOfTreesAdded < maxNumberTrees) { addTreeTo(tree.position_index); numberOfTreesAdded += 1; } }); }结束函数,返回添加的树的数量。
function addTreesRandomly( ... ) { ... return numberOfTreesAdded; } 仔细检查您的addTreesRandomly函数是否与以下内容匹配。
/** * Add any number of trees across different lanes, randomly. **/ function addTreesRandomly( { probTreeLeft = 0.5, probTreeCenter = 0.5, probTreeRight = 0.5, maxNumberTrees = 2 } = {}) { var trees = [ {probability: probTreeLeft, position_index: 0}, {probability: probTreeCenter, position_index: 1}, {probability: probTreeRight, position_index: 2}, ] shuffle(trees); var numberOfTreesAdded = 0; trees.forEach(function (tree) { if (Math.random() < tree.probability && numberOfTreesAdded < maxNumberTrees) { addTreeTo(tree.position_index); numberOfTreesAdded += 1; } }); return numberOfTreesAdded; }最后,要自动生成树,请设置一个计时器,以定期触发树生成。 全局定义计时器,并为此计时器添加新的拆卸功能。
/********* * TREES * *********/ ... var treeTimer; function setupTrees() { ... } function teardownTrees() { clearInterval(treeTimer); }接下来,定义一个新函数来初始化计时器并将计时器保存在先前定义的全局变量中。 下面的计时器每半秒运行一次。
function addTreesRandomlyLoop({intervalLength = 500} = {}) { treeTimer = setInterval(addTreesRandomly, intervalLength); }最后,在窗口加载后,从 Game 部分启动计时器。
/******** * GAME * ********/ ... window.onload = function() { ... addTreesRandomlyLoop(); }导航到您的预览,您会看到随机生成的树木。 请注意,永远不会同时存在三棵树。

障碍步骤到此结束。 我们已经成功地获取了许多模板树,并从模板中生成了无数个障碍物。 我们的生成算法还尊重游戏中的自然约束,使其具有可玩性。
在下一步中,让我们添加碰撞测试。
第 3 步:碰撞测试
在本节中,我们将实现障碍物和玩家之间的碰撞测试。 这些碰撞测试比大多数其他游戏中的碰撞测试更简单; 然而,玩家只沿着 x 轴移动,所以每当一棵树穿过 x 轴时,检查树的车道是否与玩家的车道相同。 我们将为这个游戏实现这个简单的检查。
导航到index.html ,下到TREES部分。 在这里,我们将为每棵树添加车道信息。 对于每棵树,添加data-tree-position-index= ,如下所示。 另外添加class="tree" ,以便我们可以轻松地选择所有树:
<a-entity data-tree-position-index="1" class="tree" ...> </a-entity> <a-entity data-tree-position-index="0" class="tree" ...> </a-entity> <a-entity data-tree-position-index="2" class="tree" ...> </a-entity> 导航到assets/ergo.js并在GAME部分调用新的setupCollisions函数。 此外,定义一个新的isGameRunning全局变量来表示现有游戏是否已经在运行。
/******** * GAME * ********/ var isGameRunning = false; setupControls(); setupCollision(); window.onload = function() { ... 在TREES部分之后但在 Game 部分之前定义一个新的COLLISIONS部分。 在本节中,定义 setupCollisions 函数。
/********* * TREES * *********/ ... /************** * COLLISIONS * **************/ const POSITION_Z_OUT_OF_SIGHT = 1; const POSITION_Z_LINE_START = 0.6; const POSITION_Z_LINE_END = 0.7; function setupCollision() { } /******** * GAME * ********/ 和之前一样,我们将注册一个 AFRAME 组件并使用tick事件侦听器在每个时间步运行代码。 在这种情况下,我们将向player注册一个组件,并对该侦听器中的所有树运行检查:
function setupCollisions() { AFRAME.registerComponent('player', { tick: function() { document.querySelectorAll('.tree').forEach(function(tree) { } } } } 在for循环中,首先获取树的相关信息:
document.querySelectorAll('.tree').forEach(function(tree) { position = tree.getAttribute('position'); tree_position_index = tree.getAttribute('data-tree-position-index'); tree_id = tree.getAttribute('id'); } 接下来,仍然在for循环中,如果树不在视线范围内,则在提取树的属性之后立即删除它:
document.querySelectorAll('.tree').forEach(function(tree) { ... if (position.z > POSITION_Z_OUT_OF_SIGHT) { removeTree(tree); } }接下来,如果没有游戏运行,不要检查是否有碰撞。
document.querySelectorAll('.tree').forEach(function(tree) { if (!isGameRunning) return; } 最后(仍然在for循环中),检查树是否同时与玩家共享相同的位置。 如果是这样,请调用尚未定义的gameOver函数:
document.querySelectorAll('.tree').forEach(function(tree) { ... if (POSITION_Z_LINE_START < position.z && position.z < POSITION_Z_LINE_END && tree_position_index == player_position_index) { gameOver(); } } 检查您的setupCollisions函数是否与以下内容匹配:
function setupCollisions() { AFRAME.registerComponent('player', { tick: function() { document.querySelectorAll('.tree').forEach(function(tree) { position = tree.getAttribute('position'); tree_position_index = tree.getAttribute('data-tree-position-index'); tree_id = tree.getAttribute('id'); if (position.z > POSITION_Z_OUT_OF_SIGHT) { removeTree(tree); } if (!isGameRunning) return; if (POSITION_Z_LINE_START < position.z && position.z < POSITION_Z_LINE_END && tree_position_index == player_position_index) { gameOver(); } }) } }) } 碰撞设置到此结束。 现在,我们将添加一些细节来抽象出startGame和gameOver序列。 导航到GAME部分。 更新window.onload块以匹配以下内容,将addTreesRandomlyLoop替换为尚未定义的startGame函数。
window.onload = function() { setupTrees(); startGame(); } 在 setup 函数调用下,创建一个新的startGame函数。 此函数将相应地初始化isGameRunning变量,并防止冗余调用。
window.onload = function() { ... } function startGame() { if (isGameRunning) return; isGameRunning = true; addTreesRandomlyLoop(); } 最后,定义gameOver ,它会提示“游戏结束!” 现在留言。
function startGame() { ... } function gameOver() { isGameRunning = false; alert('Game Over!'); teardownTrees(); }无尽奔跑游戏的碰撞测试部分到此结束。
在这一步中,我们再次使用了 A-Frame 组件和我们之前添加的许多其他实用程序。 我们还对游戏功能进行了重新组织和适当抽象; 我们后续会扩充这些游戏功能,以达到更完整的游戏体验。
结论
在第 1 部分中,我们添加了对 VR 耳机友好的控件:向左看向左移动,向右移动向右移动。 在本系列的第二部分中,我向您展示了构建一个基本的、功能强大的虚拟现实游戏是多么容易。 我们添加了游戏逻辑,让无尽的跑步者符合您的期望:永远奔跑,并让一系列无尽的危险障碍物飞向玩家。 到目前为止,您已经构建了一个功能强大的游戏,它对虚拟现实耳机具有无键盘支持。
以下是不同 VR 控件和耳机的其他资源:
- 用于 VR 耳机的 A 型框架
对 A-Frame VR 支持的浏览器和耳机的调查。 - 用于 VR 控制器的 A-Frame
A-Frame 如何支持无控制器、3DoF 控制器和 6DoF 控制器,以及其他交互方式。
在下一部分中,我们将添加一些收尾工作并同步游戏状态,这让我们离多人游戏更近了一步。