Nuxt 中的 Axios 入门
已发表: 2022-03-10ayncData和fetch方法在使用 Axios 的服务器端获取数据以及这两种方法之间的区别。 最后,我们将学习如何使用 Auth 模块向我们的应用程序添加身份验证。Nuxt.js 提供了一个 Axios 模块,以便与您的应用程序轻松集成。 Axios 是一个基于 Promise 的 HTTP 客户端,可以在浏览器和 Node.js 环境中工作,或者更简单地说,它是一种在客户端应用程序和 Node.js 环境中发出请求(例如 API 调用)的工具。
在本教程中,我们将学习如何使用 Axios 模块以及如何使用 asyncData 和 fetch 在服务器端发出请求。 这两种方法在服务器端发出请求,但它们有一些区别,我们也将介绍。 最后,我们将学习如何使用 auth 模块和 auth 中间件执行身份验证和保护页面/路由。
本文需要 Nuxtjs 和 Vuejs 的基本知识,因为我们将在此基础上进行构建。 对于那些没有 Vuejs 经验的人,我建议你先从他们的官方文档和 Nuxt 官方页面开始,然后再继续本文。
什么是 Nuxt.js Axios 模块?
根据官方文档,
“这是与 Nuxt.js 的安全且简单的 Axios 集成。”
以下是它的一些特点:
- 自动设置客户端和服务器端的基本 URL。
- SSR 中的代理请求标头(对身份验证有用)。
- 获取样式请求。
- 在发出请求时与 Nuxt.js 进度条集成。
要在应用程序中使用 axios 模块,您必须首先使用npm或yarn安装它。
纱
yarn add @nuxtjs/axios新PM
npm install @nuxtjs/axios 将其添加到您的nuxt.config.js文件中:
modules: [ '@nuxtjs/axios', ], axios: { // extra config eg // BaseURL: 'https://link-to-API' } modules数组接受 Nuxt.js 模块的列表,例如 dotenv、auth,在本例中为 Axios。 我们所做的是通知我们的应用程序我们将使用 Axios 模块,我们使用@nuxtjs/axios引用该模块。 然后是axios属性,它是一个配置对象,例如客户端和服务器端的 baseURL。
现在,您可以通过调用this.$axios.method或this.$axios.$method从应用程序的任何位置访问 Axios。 where方法可以是get 、 post或delete 。
使用 Axios 发出您的第一个请求
对于本教程,我在 Github 上整理了一个简单的应用程序。 存储库包含两个文件夹,start 和 finish, start文件夹包含您直接进入教程所需的所有内容。 完成文件夹包含我们将要构建的完整版本。
克隆 repo 并打开start文件夹后,我们需要在package.json文件中安装所有包,因此打开终端并运行以下命令:
npm install 完成后,我们可以使用npm run dev命令启动我们的应用程序。 这是您访问localhost:3000时应该看到的内容。
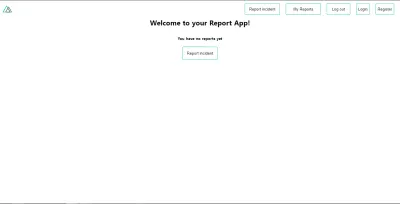
接下来我们要做的是在应用程序的根文件夹中创建一个.env文件,并将我们的 API URL 添加到其中。 在本教程中,我们将使用为收集用户报告而构建的示例 API。
API_URL=https://ireporter-endpoint.herokuapp.com/api/v2/这样,我们不必将 API 硬编码到我们的应用程序中,这对于使用两个 API(开发和生产)很有用。
下一步是打开我们的nuxt.config.js文件并将环境变量添加到我们上面添加的 axios 配置中。
/* ** Axios module configuration */ axios: { // See https://github.com/nuxt-community/axios-module#options baseURL: process.env.API_URL, }, 在这里,我们告诉 Nuxt.js,只要我们使用这个 Axios 模块,就将这个baseURL用于我们的客户端和服务器端请求。
现在,要获取报告列表,让我们打开index.vue文件并将以下方法添加到脚本部分。
async getIncidents() { let res = await this.$store.dispatch("getIncidents"); this.incidents = res.data.data.incidents; } 我们所做的是创建一个我们称之为getIncidents()的异步函数,我们可以从名称中看出它的作用——它使用 Vuex 存储操作方法this.$store.dispatch获取事件列表。 我们将此操作的响应分配给我们的事件属性,以便我们能够在组件中使用它。
我们想在组件挂载时调用getIncidents()方法。 我们可以使用mounted的钩子来做到这一点。
mounted() { this.getIncidents() } mounted()是一个生命周期钩子,在组件挂载时被调用。 这将导致在组件挂载时调用 API。 现在,让我们进入我们商店中的index.js文件并创建这个动作,我们将从这里发出我们的 Axios 请求。
export const actions = { async getIncidents() { let res = await this.$axios.get('/incidents') return res; } } 在这里,我们创建了一个名为getIncidents的操作,它是一个异步函数,然后我们等待来自服务器的响应并返回此响应。 此操作的响应被发送回index.vue文件中的getIncidents()方法。
如果我们刷新我们的应用程序,我们现在应该能够看到页面上呈现的一长串事件。
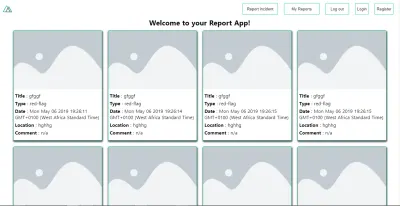
我们已经使用 Axios 发出了第一个请求,但我们不会就此止步,我们将尝试asyncData和fetch以查看它们与使用 Axios 之间的差异。
异步数据
AsyncData 在服务器端获取数据,并在加载页面组件之前调用它。 它无权访问this ,因为它是在创建页面组件数据之前调用的。 this仅在调用created钩子后可用,因此 Nuxt.js 会自动将返回的数据合并到组件的数据中。
使用asyncData有利于 SEO,因为它可以在服务器端获取您网站的内容,还有助于更快地加载内容。 请注意, asyncData方法只能在应用程序的 pages 文件夹中使用,因为它在 components 文件夹中不起作用。 这是因为在创建组件之前调用了asyncData挂钩。
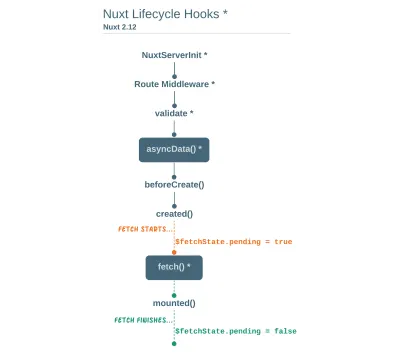
让我们将asyncData添加到我们的index.vue文件中,并观察我们的事件数据加载速度。 在我们的components属性之后添加以下代码,让我们摆脱挂载的钩子。
async asyncData({ $axios }) { let { data } = await $axios.get("/incidents"); return { incidents: data.data.incidents }; }, // mounted() { // this.getIncidents(); // }, 在这里, asyncData方法接受来自上下文$axios的属性。 我们使用这个属性来获取事件列表,然后返回值。 这个值会自动注入到我们的组件中。 现在,您可以注意到,如果您刷新页面并且在任何时候都不会出现要呈现的事件,那么您的内容加载速度有多快。
拿来
Fetch 方法也用于在服务器端发出请求。 它在生命周期中创建的钩子之后调用,这意味着它可以访问组件的数据。 与asyncData方法不同,fetch 方法可以在所有.vue文件中使用,并与Vuex 存储一起使用。 这意味着如果您的数据函数中有以下内容。
data() { return { incidents: [], id: 5, gender: 'male' }; } 您可以通过调用this.id或this.gender轻松修改id或性别。
使用 Axios 作为插件
在使用 Axios 开发的过程中,您可能会发现您需要额外的配置,例如为您的请求创建实例和拦截器,以便您的应用程序可以按预期工作,幸运的是,我们可以通过将 Axios 扩展为插件来做到这一点。
要扩展axios ,您必须在您的plugins文件夹中创建一个插件(例如axios.js )。
export default function ({ $axios, store, redirect }) { $axios.onError(error => { if (error.response && error.response.status === 500) { redirect('/login') } }) $axios.interceptors.response.use( response => { if (response.status === 200) { if (response.request.responseURL && response.request.responseURL.includes('login')) { store.dispatch("setUser", response); } } return response } ) } 这是我为 Nuxt 应用程序编写的插件示例。 在这里,您的函数接受$axios的上下文对象、 store和redirect ,我们将在配置插件时使用它们。 我们要做的第一件事是使用$axios.onError状态为500的错误并将用户重定向到登录页面。
我们还有一个拦截器,它拦截我们在应用程序中所做的每个请求响应,检查我们得到的响应状态是否为200 。 如果这是真的,我们继续检查是否有response.request.responseURL以及它是否包含登录。 如果这是真的,我们然后使用我们商店的调度方法发送这个响应,然后它在我们的状态中发生变化。
将此插件添加到您的nuxt.config.js文件中:
plugins: [ '~/plugins/axios' ]完成此操作后,您的 Axios 插件将拦截您发出的任何请求并检查您是否为它定义了特殊情况。
Auth 模块简介
auth 模块用于为 Nuxt 应用程序执行身份验证,可以使用$this.auth从应用程序中的任何位置访问。 它也可用于上下文对象中的fetch 、 asyncData 、 middleware和NuxtInitServer作为$auth 。
context提供了从 Nuxt 到 Vue 组件的附加对象/参数,并且在像上面提到的那些特殊的 nuxt 生命周期区域中可用。
要在应用程序中使用 auth 模块,您必须使用yarn或npm安装它。
纱
yarn add @nuxtjs/auth新PM
npm install @nuxtjs/auth 将其添加到您的nuxt.config.js文件中。
modules: [ '@nuxtjs/auth' ], auth: { // Options } auth属性接受一个属性列表,例如strategies和redirect 。 在这里, strategies接受您首选的身份验证方法,可以是:
-
local
对于用户名/电子邮件和基于密码的流程。 -
facebook
用于使用 Facebook 帐户作为身份验证手段。 -
Github
用于验证具有 Github 帐户的用户。 -
Google
用于使用 Google 帐户对用户进行身份验证。 - 授权0
- Laravel 护照
redirect 属性接受以下链接对象:
-
login
如果需要登录,用户将被重定向到此链接。 -
logout
如果注销后当前路由受到保护,用户将被重定向到此处。 -
home
用户登录后会被重定向到这里。
现在,让我们将以下内容添加到我们的nuxt.config.js文件中。
/* ** Auth module configuration */ auth: { redirect: { login: '/login', logout: '/', home: '/my-reports' }, strategies: { local: { endpoints: { login: { url: "/user/login", method: "post", propertyName: "data.token", }, logout: false, user: false, }, tokenType: '', tokenName: 'x-auth', autoFetchUser: false }, }, } 请注意,当上述选项中提供了user端点时, auth方法效果最好。
在auth配置对象中,我们有一个redirect选项,在该选项中,我们将登录路由设置为/login ,将注销路由设置为/ ,将主路由设置为/my-reports ,这些都将按预期运行。 我们还有一个tokenType属性,它代表我们 Axios 请求标头中的授权类型。 它默认设置为Bearer ,并且可以更改为与您的 API 一起使用。
对于我们的 API,没有令牌类型,这就是我们将其保留为空字符串的原因。 tokenName代表 Axios 请求中标头内的授权名称(或您要附加令牌的标头属性)。
默认情况下,它设置为Authorization ,但对于我们的 API,授权名称是x-auth 。 autoFetchUser属性用于在登录后使用user端点属性启用用户获取对象。 默认情况下为true ,但我们的 API 没有user端点,因此我们将其设置为false 。
对于本教程,我们将使用本地策略。 在我们的策略中,我们有用于登录、用户和注销端点的本地选项,但在我们的例子中,我们只会使用*login*选项,因为我们的演示 API 没有*logout*端点并且我们的用户对象正在返回当*login*成功时。
注意: auth模块没有注册端点选项,这意味着我们将以传统方式注册并将用户重定向到登录页面,我们将使用this.$auth.loginWith执行身份验证。 这是用于验证您的用户的方法。 它接受一个“策略”(例如local )作为第一个参数,然后是一个执行此身份验证的对象。 看看下面的例子。
let data { email: '[email protected]', password: '123456' } this.$auth.loginWith('local', { data })使用认证模块
现在我们已经配置了我们的 auth 模块,我们可以进入我们的注册页面。 如果您访问/register页面,您应该会看到一个注册表单。
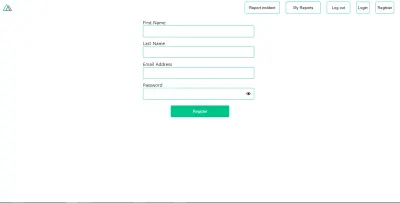
让我们通过添加以下代码来使这个表单起作用:
methods: { async registerUser() { this.loading = true; let data = this.register; try { await this.$axios.post("/user/create", data); this.$router.push("/login"); this.loading = false; this.$notify({ group: "success", title: "Success!", text: "Account created successfully" }); } catch (error) { this.loading = false; this.$notify({ group: "error", title: "Error!", text: error.response ? error.response.data.error : "Sorry an error occured, check your internet" }); } } } 在这里,我们有一个名为registerUser的异步函数,它与模板中的点击事件相关联,并向端点/user/create发出包装在try/catch 块中的 Axios 请求。 这将重定向到/login页面并通知用户注册成功。 我们还有一个 catch 块,如果请求不成功,它会提醒用户任何错误。

如果注册成功,您将被重定向到登录页面。
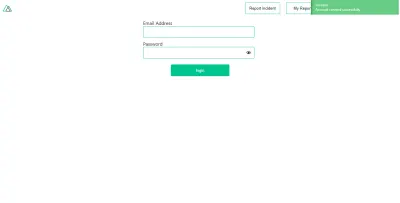
在这里,我们将使用身份验证方法this.$auth.loginWith('local', loginData)之后我们将使用this.$auth.setUser(userObj)在我们的auth实例中设置用户。
为了让登录页面正常工作,让我们将以下代码添加到我们的login.vue文件中。
methods: { async logIn() { let data = this.login; this.loading = true; try { let res = await this.$auth.loginWith("local", { data }); this.loading = false; let user = res.data.data.user; this.$auth.setUser(user); this.$notify({ group: "success", title: "Success!", text: "Welcome!" }); } catch (error) { this.loading = false; this.$notify({ group: "error", title: "Error!", text: error.response ? error.response.data.error : "Sorry an error occured, check your internet" }); } } } 我们使用身份验证方法this.$auth.loginWith('local, loginData)创建了一个名为logIn的异步函数。 如果此登录尝试成功,我们然后使用this.$auth.setUser(userInfo)将用户数据分配给我们的 auth 实例,并将用户重定向到/my-report页面。
您现在可以使用this.$auth.user或使用 Vuex 使用this.$store.state.auth.user获取用户数据,但这还不是全部。 auth实例包含一些其他属性,如果您登录或使用 Vue 开发工具检查您的状态,您可以看到这些属性。
如果您将this.$store.state.auth到控制台,您将看到:
{ "auth": { "user": { "id": "d7a5efdf-0c29-48aa-9255-be818301d602", "email": "[email protected]", "lastName": "Xo", "firstName": "Tm", "othernames": null, "isAdmin": false, "phoneNumber": null, "username": null }, "loggedIn": true, "strategy": "local", "busy": false } } auth实例包含一个loggedIn属性,该属性可用于在应用程序的 nav/header 部分中的经过身份验证的链接之间切换。 它还包含一个策略方法,用于说明实例正在运行的策略类型(例如本地)。
现在,我们将利用这个loggedIn属性来安排我们的nav链接。 将您的navBar组件更新为以下内容:
<template> <header class="header"> <div class="logo"> <nuxt-link to="/"> <Logo /> </nuxt-link> </div> <nav class="nav"> <div class="nav__user" v-if="auth.loggedIn"> <p>{{ auth.user.email }}</p> <button class="nav__link nav__link--long"> <nuxt-link to="/report-incident">Report incident</nuxt-link> </button> <button class="nav__link nav__link--long"> <nuxt-link to="/my-reports">My Reports</nuxt-link> </button> <button class="nav__link" @click.prevent="logOut">Log out</button> </div> <button class="nav__link" v-if="!auth.loggedIn"> <nuxt-link to="/login">Login</nuxt-link> </button> <button class="nav__link" v-if="!auth.loggedIn"> <nuxt-link to="/register">Register</nuxt-link> </button> </nav> </header> </template> <script> import { mapState } from "vuex"; import Logo from "@/components/Logo"; export default { name: "nav-bar", data() { return {}; }, computed: { ...mapState(["auth"]) }, methods: { logOut() { this.$store.dispatch("logOut"); this.$router.push("/login"); } }, components: { Logo } }; </script> <style></style> 在我们的模板部分,我们有几个链接到应用程序的不同部分,我们现在使用auth.loggedIn来根据身份验证状态显示适当的链接。 我们有一个注销按钮,它有一个带有logOut()函数的click事件。 我们还显示从 auth 属性获取的用户电子邮件,该属性使用mapState方法从我们的 Vuex 存储访问,该方法将我们的状态身份验证映射到 nav 组件的计算属性。 我们还有一个logout方法,它调用我们的 Vuex 操作logOut并将用户重定向到login页面。
现在,让我们继续更新我们的商店以进行logOut操作。
export const actions = { // .... logOut() { this.$auth.logout(); } } logOut操作调用 auth logout方法,该方法清除用户数据、从localStorage中删除令牌并将loggedIn设置为false 。
/my-reports和report-incident之类的路线不应该对客人可见,但在我们的应用程序中,情况并非如此。 Nuxt 没有可以保护您的路线的导航守卫,但它有 auth 中间件。 它使您可以自由地创建自己的中间件,以便您可以对其进行配置以按照您想要的方式工作。
可以通过两种方式设置:
- 每条路线。
- 全局用于
nuxt.config.js文件中的整个应用程序。
router: { middleware: ['auth'] } 此auth中间件适用于您的auth实例,因此您无需在中间件文件夹中创建auth.js文件。
现在让我们将此中间件添加到我们的my-reports.vue和report-incident.vue文件中。 将以下代码行添加到每个文件的脚本部分。
middleware: 'auth' 现在,我们的应用程序将检查尝试访问这些路由的用户是否具有true的auth.loggedIn值。 它将使用我们的身份验证配置文件中的重定向选项将它们重定向到登录页面——如果您没有登录并且您尝试访问/my-report或report-incident ,您将被重定向到/login 。
如果你去/report-incidents ,这就是你应该看到的。
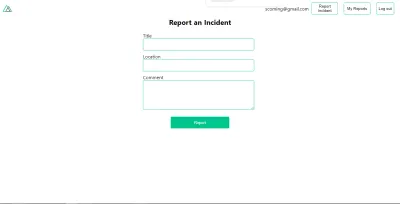
此页面用于添加事件,但现在表单不会将事件发送到我们的服务器,因为当用户尝试提交表单时我们没有调用服务器。 为了解决这个问题,我们将添加一个reportIncident方法,当用户单击Report时将调用该方法。 我们将在组件的脚本部分拥有它。 此方法会将表单数据发送到服务器。 使用以下内容更新您的report-incident.vue文件:
<template> <section class="report"> <h1 class="report__heading">Report an Incident</h1> <form class="report__form"> <div class="input__container"> <label for="title" class="input__label">Title</label> <input type="text" name="title" v-model="incident.title" class="input__field" required /> </div> <div class="input__container"> <label for="location" class="input__label">Location</label> <input type="text" name="location" v-model="incident.location" required class="input__field" /> </div> <div class="input__container"> <label for="comment" class="input__label">Comment</label> <textarea name="comment" v-model="incident.comment" class="input__area" cols="30" rows="10" required ></textarea> </div> <input type="submit" value="Report" class="input__button" @click.prevent="reportIncident" /> <p class="loading__indicator" v-if="loading">Please wait....</p> </form> </section> </template> <script> export default { name: "report-incident", middleware: "auth", data() { return { loading: false, incident: { type: "red-flag", title: "", location: "", comment: "" } }; }, methods: { async reportIncident() { let data = this.incident; let formData = new FormData(); formData.append("title", data.title); formData.append("type", data.type); formData.append("location", data.location); formData.append("comment", data.comment); this.loading = true; try { let res = await this.$store.dispatch("reportIncident", formData); this.$notify({ group: "success", title: "Success", text: "Incident reported successfully!" }); this.loading = false; this.$router.push("/my-reports"); } catch (error) { this.loading = false; this.$notify({ group: "error", title: "Error!", text: error.response ? error.response.data.error : "Sorry an error occured, check your internet" }); } } } }; </script> <style> </style> 在这里,我们有一个表单,其中包含标题、位置和评论的输入字段,并使用v-model进行双向数据绑定。 我们还有一个带有点击事件的submit按钮。 在脚本部分,我们有一个reportIncident方法,它收集表单中提供的所有信息,并使用 FormData 发送到我们的服务器,因为 API 也被设计为接受图像和视频。
此formData使用 dispatch 方法附加到 Vuex 操作,如果请求成功,您将被重定向到/my-reports并通知您此请求成功,否则,您将收到错误消息的错误通知.
此时,我们的商店中还没有reportIncident操作,因此在您的浏览器控制台中,如果您尝试单击此页面上的提交,您会看到一个错误。
![显示“[Vuex] 未知操作类型:reportIncident”的错误消息](/uploads/article/1963/SEKFXM60p8RtNYQ0.png)
要解决此问题,请将reportIncident操作添加到您的index.js文件中。
export const actions = { // ... async reportIncident({}, data) { let res = await this.$axios.post('/incident/create', data) return res; } } 在这里,我们有一个reportIncident函数,它接收一个空的上下文对象和我们从表单发送的数据。 然后将此数据附加到创建事件并返回到我们的report-incident.vue文件的post请求中。
此时,您应该能够使用表单添加报告,之后您将被重定向到/my-reports页面。
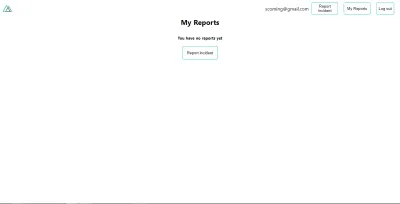
此页面应显示用户创建的事件列表,但现在它只显示我们在上面看到的内容,让我们继续解决这个问题。
我们将使用我们学到的fetch方法来获取这个列表。 使用以下内容更新您的my-reports.vue文件:
<script> import incidentCard from "@/components/incidentCard.vue"; export default { middleware: "auth", name: "my-reports", data() { return { incidents: [] }; }, components: { incidentCard }, async fetch() { let { data } = await this.$axios.get("/user/incidents"); this.incidents = data.data; } }; </script> 在这里,我们使用fetch方法来获取用户特定的事件并将响应分配给我们的事件数组。
如果您在添加事件后刷新页面,您应该会看到类似这样的内容。
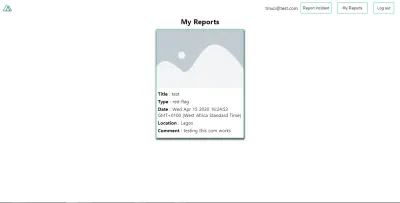
此时,我们会注意到fetch方法和asyncData加载数据的方式有所不同。
结论
到目前为止,我们已经了解了 Axios 模块及其所有功能。 我们还了解了有关 asyncData 的更多信息,以及尽管它们存在差异,但我们如何将它们一起获取。 我们还学习了如何使用 auth 模块在我们的应用程序中执行身份验证,以及如何使用 auth 中间件来保护我们的路由。 以下是一些有用的资源,它们更多地讨论了我们所涵盖的所有内容。
- Nuxjs 中的元标记入门。
- 在 Nuxt 中使用 dotenv 模块。
- 在您的 Nuxt 应用程序中使用 Fetch。
- 开始使用异步数据。
资源
- “认证模块”,NuxtJS.org
- “Axios 模块:简介”,NuxtJS.org
-
FormData, MDN 网络文档 - “API:
asyncData方法”,NuxtJS.org - “Vue 实例:生命周期图”,VueJS.org
- “了解
fetch在 Nuxt 2.12 中的工作原理”,NuxtJS.org
