20+ En Çok Aranan WordPress Döngü Hackleri
Yayınlanan: 2017-12-20Döngü, WordPress'teki ana işlemdir, bu nedenle hemen hemen her tema dosyasında bulunur. Esasen, platform tarafından bir temanın şablon dosyaları aracılığıyla gönderileri görüntülemek için kullanılan bir PHP kodudur. Başka bir deyişle, çok büyük. Aslında bu kritik çünkü site bir döngü olmadan çalışmayacaktır.
Bu inanılmaz derecede güçlü özellikler setini değiştirmek, WordPress sitenizin yeteneklerini geliştirebilir. Örneğin, gönderilerin ana sayfada gösterilme şeklini değiştirebilir ve belirli parametreleri kullanarak bunları sıralayabilirsiniz. Döngünün değiştirilmesi en kolay şey olduğu göz önüne alındığında, oldukça etkileyici ve yaratıcı tüyolar elde edilebilir.
Eklenti yüklemeye gerek kalmadan bunu gerçekleştirmek için hemen kullanmanız gereken 20'den fazla döngü hilesini gösterelim.
#1. İlk Gönderiden Sonra Reklamı Yerleştirin
Bir blogcu olarak, reklamların para kazanmanın en iyi yollarından biri olduğunu çok iyi bilirsiniz. Ziyaretçilerden çok ihtiyaç duyulan bu tıklamaları almak kesinlikle zor bir iştir ve birçok blogcu yüksek tıklama oranlarından hoşlanmaz. Reklamları ilk gönderiden sonra yerleştirmek, onları artırmanın iyi bir yolu olabilir, bu yüzden bu basit düzeltmeyi deneyin.
Döngünüzü aşağıdaki ile değiştirin. Dikkat edin, reklamın kodunu oraya yapıştırmanız gerekir:
<?php if (have_posts()) : ?>
<?php $count = 0; ?>
<?php while (have_posts()) : the_post(); ?>
<?php $count++; ?>
  <?php if ($count == 2) : ?>
          //Insert the code of an ad in this line
          <h2><a href="<?php the_permalink(); ?>"><?php the_title(); ?></a></h2>
          <?php the_excerpt(); ?>
   <?php else : ?>
          <h2><a href="<?php the_permalink(); ?>"><?php the_title(); ?></a></h2>
          <?php the_excerpt(); ?>
  <?php endif; ?>
<?php endwhile; ?>
<?php endif; ?>
#2. Eski ama Popüler 1 Yaşındaki Gönderileri Görüntüle

Blogunuzdaki bazı gönderiler, bir yıl önce oluşturulmuş olmasına rağmen, okuyucularınız arasında hala popüler olabilir. Örneğin, bir nasıl yapılır makalesi veya başka bir tür sürekli yeşil içerik olabilir. Bu gönderilerin popüler kalmasını sağlamak için bu kullanışlı tüyoyu uygulayabilirsiniz.
Bu kodu single.php dosyasına ekleyin:
<?php
$current_day = date('j');
$last_year = date('Y')-1;
query_posts('day='.$current_day.'&year='.$last_year);
if (have_posts()):
    while (have_posts()) : the_post();
       the_title();
       the_excerpt();
    endwhile;
endif;
?>
#3. Döngüde Son Beş Yapışkan Mesajı Görüntüle
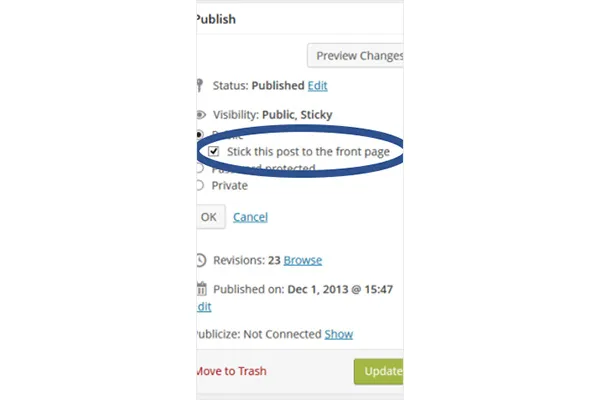
Varsayılan işlev, bir gönderiyi ön sayfaya yapıştırmaya izin verir. Aşağıdaki hack, beş yapışkan gönderi yerleştiriyor.
Birçok blogcu, bir girişin diğerlerinin üzerinde görüntülenmesine izin verdiği için yapışkan gönderileri öne çıkan gönderiler olarak düşünür. Kendi “Editörün Seçtikleri” kategorinizi oluşturmak istiyorsanız, tam da bunun için bir hile var. Aşağıdaki kodun çalışması için temanın herhangi bir yerine eklenmesi gerekir. Dördüncü satırdaki numarayı değiştirerek daha az gönderi göstermek için numarayı da değiştirebilirsiniz.
<?php
$sticky = get_option('sticky_posts');
rsort( $sticky );
$sticky = array_slice( $sticky, 0, 5);
query_posts( array( 'post__in' => $sticky, 'caller_get_posts' => 1 ) );

if (have_posts()) :
    while (have_posts()) : the_post();
        the_title();
        the_excerpt();
    endwhile;
endif;

?>
#4. Belirli Bir Kategoriden Gönderileri Listeleme
Aşağıdaki hack ile aynı kategorideki gönderileri ayırt edin.
Herhangi bir nedenle aynı kategoriyi paylaşan gönderileri ayırt etmeniz gerekiyorsa (örneğin, deneme yazarları için nasıl yapılır makaleleri), döngü dosyasına aşağıdaki kodu ekleyin.
<?php foreach((get_the_category()) as $category) {
      	$thecat = $category->cat_ID . ' ';
    	query_posts('child_of='.$thecat);
 if (have_posts()) : while (have_posts()) : the_post();
    //Classic WP loop
 endwhile;endif;
?>
#5. Gelecekteki Gönderilerin Listesini Sağlayın
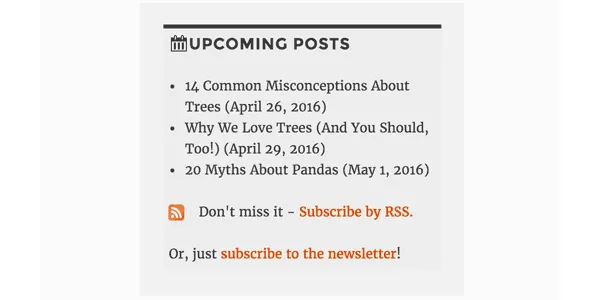
Okuyucuların yaklaşan gönderiler hakkında bilgi sahibi olmaları onların ilgisini çekebilir ve onları okumak için blogunuza dönmelerini sağlayabilir. Bu size harika bir fikir gibi geliyorsa, WordPress sitenizde gelecek yayınların kısa bir listesini sağlamak için aşağıdaki kodu kullanın.
<?php query_posts('showposts=10&post_status=future'); ?>
<?php if ( have_posts() ) : while ( have_posts() ) : the_post(); ?>
    <h2><?php the_title(); ?></h2>
    <span class="datetime"><?php the_time('j. F Y'); ?></span></p>
<?php endwhile;
else: ?><p>No future events scheduled.</p>
<?php endif; ?>
#6. Belirli Bir Tarihte Yüklenen Gönderileri Alın
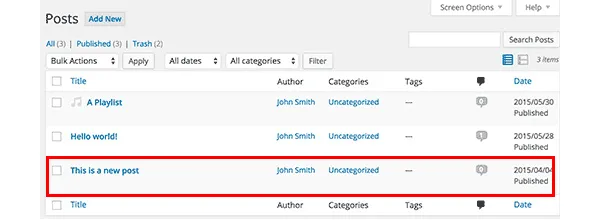
Feed'inizde bazı gönderileri bulmakta sık sık zorlanıyorsanız, bunları bir döngü kullanarak arayabilirsiniz. Aramayı gerçekten kolaylaştıran aşağıdaki kodu ekleyerek mümkündür. Özellikle, sizin belirttiğiniz iki tarih arasında kaydedilen girdileri alır.
<?php
  function filter_where($where = '') {
        $where .= " AND post_date >= '2012-08-19' AND post_date <= '2012-08-11'";
    return $where;
  }
add_filter('posts_where', 'filter_where');
query_posts($query_string);
while (have_posts()) :
      the_post();
      the_content();
endwhile;

?>
#7. Bir Görüntü Döngüsü Görüntüle
İnsanların çoğu görselleri takdir ettiğinden, bir WordPress web sitesinin başlangıç sayfasındaki resim galerisi iyi bir fikirdir. Gönderileriniz bir ana görsel içeriyorsa, aşağıdaki kod onları bir döngü içinde sergilemek üzere alacaktır.
Functions.php dosyasına aşağıdaki kodu ekleyin:
function catch_that_image() {
  global $post, $posts;
  $first_img = '';
  ob_start();
  ob_end_clean();
  $output = preg_match_all('/<img.+src=['"]([^'"]+)['"].*>/i', $post->post_content, $matches);
  $first_img = $matches [1] [0];

  if(empty($first_img)){ //Determines a default image
    $first_img = "/images/default.jpg";
  }
  return $first_img;
}
#8. Bir Son Kullanma Tarihi Ayarlayarak Gönderileri Otomatik Olarak Kaldır
Blogunuzdaki okuyucu sayısını artırmak için bir yarışma düzenlediğinizi varsayalım. Yarışma bittiğinde, sonuçları ve en önemlisi, cevapları veya ipuçlarını ve ipuçlarını yayınlarsınız. Elbette, okuyucular için sonsuza kadar erişilebilir olmamalı çünkü gelecekte başka bir yarışma düzenleyebilirsiniz, değil mi?
Gönderileri unuttuğunuzda bile kaldırmanın iyi bir yolu, bir son kullanma tarihi belirleyerek planlamaktır. Aşağıdaki döngü mevcut döngünüzün yerini alır ve tam da bunu yapar.
Sona erme süresini değiştirmek için aa/gg/yyyy 00:00:00 biçimini kullanmayı unutmayın.
<?php
if (have_posts()) :
while (have_posts()) : the_post(); ?>
$expirationtime = get_post_custom_values('expiration');
if (is_array($expirationtime)) {
$expirestring = implode($expirationtime);
}

$secondsbetween = strtotime($expirestring)-time();
if ( $secondsbetween > 0 ) {
// For example…
the_title();
the_excerpt();
}
endwhile;
endif;
?>
#9. Geri İzlemelerden Ayrı Yorumlar

Blogunuzdaki popüler bir girişe diğer birçok siteden bağlantı verilecektir. Okuyucuların yorumlar bölümündeki tartışmayı rahatça takip edebilmelerini sağlamak için yorumları ve geri izlemeleri ayırmalısınız.
Tek yapmanız gereken yorumlar.php'yi açmak ve aşağıdakileri aramak:
foreach ($comments as $comment) : ?>
// Comments are displayed here
endforeach;
Buldun mu? Harika, şimdi yeni bir kodla değiştirin:
<ul class="commentlist">
<?php //Displays comments only
foreach ($comments as $comment) : ?>
<?php $comment_type = get_comment_type(); ?>
<?php if($comment_type == 'comment') { ?>
<li>//Comment code goes here</li>
<?php }
endforeach;
</ul>

<ul>
<?php //Displays trackbacks only
foreach ($comments as $comment) : ?>
<?php $comment_type = get_comment_type(); ?>
<?php if($comment_type != 'comment') { ?>
<li><?php comment_author_link() ?></li>
<?php }
endforeach;

</ul>

#10. İlgili Gönderileri Göster

İlgili gönderileri görüntülemek, okuyucuyu artırmanın iyi bir yoludur. Bunu başarmak için tek yapmanız gereken single.php dosyasına özel bir kod yapıştırmak.
<?php
  $backup = $post;  // backup the current object
  $tags = ks29so_get_post_tags($post->ID);
  $tagIDs = array();
  if ($tags) {
    $tagcount = count($tags);
    for ($i = 0; $i < $tagcount; $i++) {
      $tagIDs[$i] = $tags[$i]->term_id;
    }
    $args=array(
      'tag__in' => $tagIDs,
      'post__not_in' => array($post->ID),
      'showposts'=>5,
      'caller_get_posts'=>1
    );
    $my_query = new WP_Query($args);
    if( $my_query->have_posts() ) {
      while ($my_query->have_posts()) : $my_query->the_post(); ?>
        <h3><a href="<?php the_permalink() ?>" rel="bookmark" title="<?php the_title(); ?>"><?php the_title(); ?></a></h3>
      <?php endwhile;
    } else { ?>
      <h2>No related posts found!</h2>
    <?php }
  }
  $post = $backup;  // copy it back
  ks29so_reset_query(); // to use the original query again
?>
#11. Belirli Gönderilerin Ana Sayfada Nasıl Görüntülendiğini Belirleyin
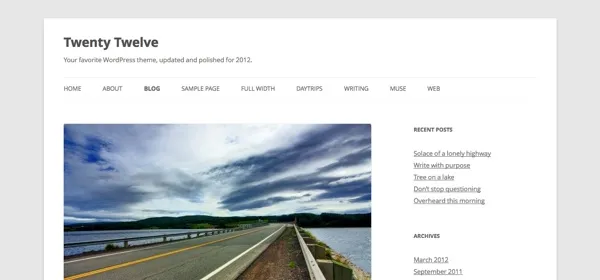
WordPress temalarının büyük çoğunluğu, tüm gönderileri başlangıç sayfasında aynı şekilde gösterir. Ancak beğenmediyseniz, bunu değiştirebilir ve hangilerinin tam olarak görüntülenmesi gerektiğini ve hangilerinin yalnızca alıntıların yeterli olduğunu belirleyebilirsiniz.
index.php dosyasını bulun ve orada döngü arayın. Aşağıdaki kod onun yerine geçer:
<?php if (have_posts()) :
    while (have_posts()) : the_post();
         $customField = get_post_custom_values("full");
         if (isset($customField[0])) {
             //Custom field is set, display a full post
              the_title();
              the_content();
         } else {
             // No custom field set, lets display an excerpt
              the_title();
              the_excerpt();
    endwhile;
endif;
?>
#12. Tanıtım İçeriğini Ana Sayfadaki Gönderilerin Üzerinde Görüntüleyin
Promosyon içeriği eklemek için aşağıdaki kodu index.php dosyasına ekleyin.
<div class="content-loop">
#13. Bir Sayfadaki Tüm Blog Yazarlarını Listeleme

Tüm yazarların listesini görüntülemek için bu kodu döngünün herhangi bir yerine yapıştırmanız yeterlidir.
<ul>
<?php ks29so_list_authors('exclude_admin=0&optioncount=1&show_fullname=1&hide_empty=1'); ?>
</ul>
#14. Konuk Yazarın Adını Göstermek için Özel Alanı Kullanın
Blogunuzda konuk yazarlar kullanıyorsanız, büyük olasılıkla onlar için ayrı bir sayfa oluşturmazsınız. Bunun yerine neden sadece adlarını göstermiyorsunuz?
Bunu yapmak için bu kodu single.php'ye ekleyin:
<?php $author = get_post_meta($post->ID, "guest-author", true);
if ($author != "") {
echo $author;
} else {
the_author();
} ?>
#15. Bir Resmi Yayınlamak İçin Zorunlu Bir Gereksinim Yapın
Görsel içeren gönderiler, genellikle görsel olmayan gönderilerden daha fazla izlenir. Zorunlu hale getirmek için function.php dosyanızı açın.
add_action('save_post', 'wpds_check_thumbnail');
add_action('admin_notices', 'wpds_thumbnail_error');

function wpds_check_thumbnail( $post_id ) {
 // change to any custom post type
  if( get_post_type($post_id) != 'post' )
      return;

  if ( ! has_post_thumbnail( $post_id ) ) {
   // set a transient to show the users an admin message
    set_transient( "has_post_thumbnail", "no" );
   // unhook this function so it doesn't loop infinitely
    remove_action('save_post', 'wpds_check_thumbnail');
   // update the post set it to draft
    ks29so_update_post(array('ID' => $post_id, 'post_status' => 'draft'));

    add_action('save_post', 'wpds_check_thumbnail');
  } else {
    delete_transient( "has_post_thumbnail" );
  }
}

function wpds_thumbnail_error() {
 // check if the transient is set, and display the error message
  if ( get_transient( "has_post_thumbnail" ) == "no" ) {
    echo "<div class='error'><p><strong>You must add a Featured Image before publishing this. Don't panic, your post is saved.</strong></p></div>";
    delete_transient( "has_post_thumbnail" );
  }
}
#16. Kayıttan Sonra Belirli Bir Sayfaya Yönlendirin
Functions.php dosyasını açın ve aşağıdaki kodu ekleyin.
function __my_registration_redirect(){
    return home_url( '/my-page' );
}
add_filter( 'registration_redirect', '__my_registration_redirect' );

#17. Insert Ads in Post
Use this code in your functions.php file to wrap ads in a post in any place you want.
Hack
function googleadsense($content){
  $adsensecode = 'Your Ad Codes Here';
  $pattern = '<!-googlead->';
  $content = str_replace($pattern, $adsensecode, $content);
  return $content;
}
add_filter('the_content', 'googleadsense');
#18. Reklamları Görüntülemek için Kısa Kodları Kullanın
Reklam eklemek istediğiniz yeri seçin ve aşağıdaki kodu function.php'ye yapıştırın.
function showads() {
    return '
AD’S CODE HERE
';
}
add_shortcode('adsense', 'showads');
#19. En Çok Yorumlanan Gönderileri Görüntüle

En çok yorum alan gönderileri göstermek için function.php dosyasına aşağıdaki kodu ekleyin.
function wpb_most_commented_posts() {
ob_start();?>
<ul class="most-commented">
<?php
$query = new
WP_Query('orderby=comment_count&posts_per_page=10');
while($query->have_posts()) : $query->the_post(); ?>
<li><a href="<?php the_permalink(); ?>" title="<?php the_title(); ?>"><?php the_title(); ?></a> <span class="wpb-comment-count"><?php comments_popup_link('No Comments;', '1 Comment', '% Comments'); ?></span></li>
<?php endwhile; ?>
</ul>
<?php// Turn off output buffering
$output = ob_get_clean();
return $output; }
add_shortcode('wpb_most_commented', 'wpb_most_commented_posts');
add_filter('widget_text', 'do_shortcode');
#20. Öne Çıkan Resim Desteğini Etkinleştir
WordPress temalarının büyük çoğunluğu öne çıkan görselleri destekler, ancak sizinki desteklemiyorsa bunu function.php dosyasına ekleyerek etkinleştirebilirsiniz.
add_theme_support( 'post-thumbnails' );
#21. Son Yorumları Göster
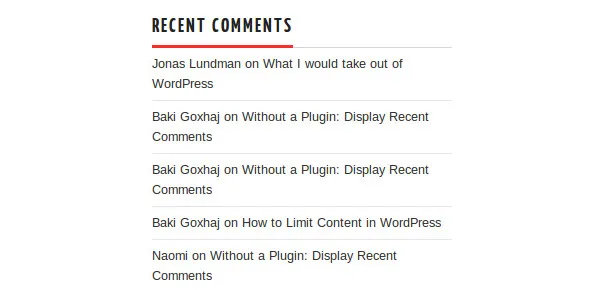
En son beş yorumu görüntülemek için bu kodu döngünün herhangi bir yerinde kullanın.
<?php
$query = "SELECT * from $wpdb->comments WHERE comment_approved= '1'
ORDER BY comment_date DESC LIMIT 0 ,5";
$comments = $wpdb->get_results($query);
if ($comments) {
echo '<ul>';
foreach ($comments as $comment) {
$url = '<a href="'. get_permalink($comment->comment_post_ID).'#comment-'.$comment->comment_ID .'" title="'.$comment->comment_author .' | '.get_the_title($comment->comment_post_ID).'">';
echo '<li>';
echo '<div class="img">';
echo $url;
echo get_avatar( $comment->comment_author_email, $img_w);
echo '</a></div>';
echo '<div class="txt">Par: ';
echo $url;
echo $comment->comment_author;
echo '</a></div>';
echo '</li>';
}
echo '</ul>';
}
?>
Hack'e hazır mısınız?
Bu kullanışlı ince ayarları kullanın ve WordPress sitenizin işlevselliğini artırın!
