20+ WordPress Loop Hacks ที่ต้องการมากที่สุด
เผยแพร่แล้ว: 2017-12-20ลูปเป็นกระบวนการหลักใน WordPress ดังนั้นจึงพบได้ในไฟล์ธีมเกือบทุกไฟล์ โดยพื้นฐานแล้ว มันคือโค้ด PHP ที่แพลตฟอร์มใช้เพื่อแสดงโพสต์ผ่านไฟล์เทมเพลตของธีม กล่าวอีกนัยหนึ่งมันใหญ่มาก อันที่จริง มันสำคัญมากเพราะไซต์จะไม่ทำงานโดยไม่มีการวนซ้ำ
การปรับแต่งชุดคุณลักษณะที่ทรงพลังอย่างเหลือเชื่อนี้อาจเพิ่มขีดความสามารถของไซต์ WordPress ของคุณ ตัวอย่างเช่น คุณสามารถเปลี่ยนวิธีการแสดงโพสต์ในหน้าแรกและจัดเรียงโดยใช้พารามิเตอร์เฉพาะ เนื่องจากลูปเป็นสิ่งที่ง่ายที่สุดในการปรับเปลี่ยน เราจึงสามารถแฮ็กที่น่าประทับใจและสร้างสรรค์ได้
มาแสดงให้คุณเห็นการแฮ็กแบบวนซ้ำมากกว่า 20 รายการที่คุณควรใช้ตอนนี้เพื่อทำให้มันเกิดขึ้น โดยไม่ต้องติดตั้งปลั๊กอิน
#1. วางโฆษณาหลังโพสต์แรก
ในฐานะบล็อกเกอร์ คุณทราบดีว่าโฆษณาเป็นหนึ่งในวิธีที่ดีที่สุดในการสร้างรายได้ การได้รับคลิกที่จำเป็นมากจากผู้เยี่ยมชมนั้นเป็นเรื่องยากอย่างแน่นอน และบล็อกเกอร์จำนวนมากไม่ชอบอัตราการคลิกผ่านที่สูง การวางโฆษณาหลังจากโพสต์แรกอาจเป็นวิธีที่ดีในการเพิ่มโฆษณา ดังนั้นให้ลองใช้การปรับแต่งง่ายๆ นี้
แทนที่ลูปของคุณด้วยอันด้านล่าง ให้ความสนใจ เนื่องจากคุณต้องวางโค้ดของโฆษณาที่นั่น:
<?php if (have_posts()) : ?>
<?php $count = 0; ?>
<?php while (have_posts()) : the_post(); ?>
<?php $count++; ?>
  <?php if ($count == 2) : ?>
          //Insert the code of an ad in this line
          <h2><a href="<?php the_permalink(); ?>"><?php the_title(); ?></a></h2>
          <?php the_excerpt(); ?>
   <?php else : ?>
          <h2><a href="<?php the_permalink(); ?>"><?php the_title(); ?></a></h2>
          <?php the_excerpt(); ?>
  <?php endif; ?>
<?php endwhile; ?>
<?php endif; ?>
#2. แสดงโพสต์เก่าอายุ 1 ปีแต่เป็นที่นิยม

โพสต์บางส่วนในบล็อกของคุณ แม้ว่าจะสร้างขึ้นเมื่อหนึ่งปีที่แล้ว แต่อาจยังคงได้รับความนิยมในหมู่ผู้อ่านของคุณ ตัวอย่างเช่น อาจเป็นบทความฮาวทูหรือเนื้อหาที่ไม่สิ้นสุดประเภทอื่นๆ เพื่อให้แน่ใจว่าโพสต์เหล่านี้จะได้รับความนิยม คุณสามารถใช้แฮ็คที่มีประโยชน์นี้ได้
ใส่รหัสนี้ลงในไฟล์ single.php:
<?php
$current_day = date('j');
$last_year = date('Y')-1;
query_posts('day='.$current_day.'&year='.$last_year);
if (have_posts()):
    while (have_posts()) : the_post();
       the_title();
       the_excerpt();
    endwhile;
endif;
?>
#3. แสดงโพสต์ Sticky ล่าสุดห้าโพสต์ในลูป
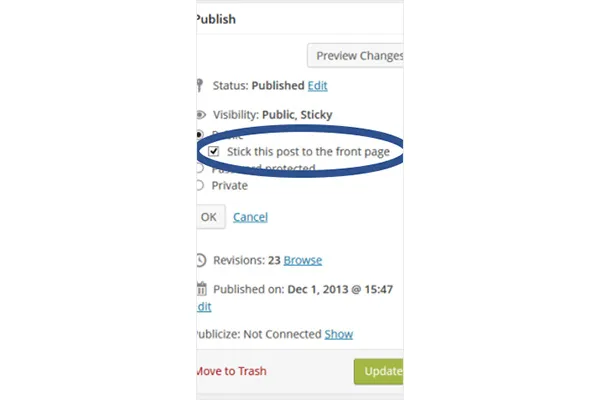
ฟังก์ชั่นเริ่มต้นช่วยให้ติดหนึ่งโพสต์ที่หน้าแรก แฮ็คด้านล่างวางห้าโพสต์ที่ติดหนึบ
บล็อกเกอร์หลายคนคิดว่าโพสต์ที่ติดหนึบเป็นโพสต์เด่นเพราะอนุญาตให้แสดงรายการเหนือคนอื่นๆ หากคุณต้องการสร้างหมวดหมู่ "คัดสรรโดยบรรณาธิการ" ของคุณเอง มีวิธีแฮ็กสำหรับสิ่งนั้น ต้องแทรกโค้ดด้านล่างที่ใดก็ได้ในธีมจึงจะใช้งานได้ คุณยังสามารถเปลี่ยนหมายเลขเพื่อแสดงโพสต์น้อยลงได้ด้วยการแทนที่หมายเลขในบรรทัดที่สี่
<?php
$sticky = get_option('sticky_posts');
rsort( $sticky );
$sticky = array_slice( $sticky, 0, 5);
query_posts( array( 'post__in' => $sticky, 'caller_get_posts' => 1 ) );

if (have_posts()) :
    while (have_posts()) : the_post();
        the_title();
        the_excerpt();
    endwhile;
endif;

?>
#4. แสดงรายการโพสต์จากหมวดหมู่เฉพาะ
แยกแยะโพสต์จากหมวดหมู่เดียวกันด้วยการแฮ็กด้านล่าง
หากคุณต้องการแยกโพสต์ที่มีหมวดหมู่เดียวกันด้วยเหตุผลบางอย่าง (เช่น บทความฮาวทูสำหรับนักเขียนเรียงความ) ให้ใส่โค้ดต่อไปนี้ลงในไฟล์ลูป
<?php foreach((get_the_category()) as $category) {
      	$thecat = $category->cat_ID . ' ';
    	query_posts('child_of='.$thecat);
 if (have_posts()) : while (have_posts()) : the_post();
    //Classic WP loop
 endwhile;endif;
?>
#5. ระบุรายการโพสต์ในอนาคต
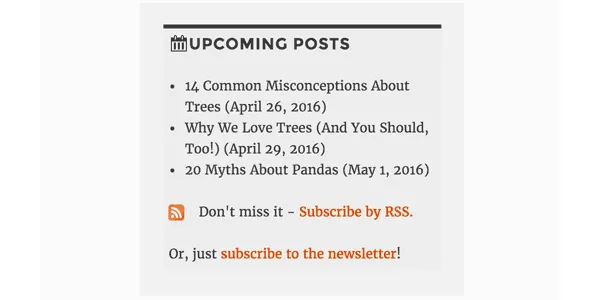
การแจ้งให้ผู้อ่านทราบเกี่ยวกับโพสต์ที่กำลังจะเกิดขึ้นอาจจุดประกายความสนใจและทำให้พวกเขากลับมาที่บล็อกของคุณเพื่ออ่าน หากฟังดูเป็นความคิดที่ดีสำหรับคุณ ให้ใช้รหัสด้านล่างเพื่อจัดทำรายการบทความสั้น ๆ ที่กำลังจะมีขึ้นในไซต์ WordPress ของคุณ
<?php query_posts('showposts=10&post_status=future'); ?>
<?php if ( have_posts() ) : while ( have_posts() ) : the_post(); ?>
    <h2><?php the_title(); ?></h2>
    <span class="datetime"><?php the_time('j. F Y'); ?></span></p>
<?php endwhile;
else: ?><p>No future events scheduled.</p>
<?php endif; ?>
#6. รับโพสต์ที่อัปโหลดในวันที่ระบุ
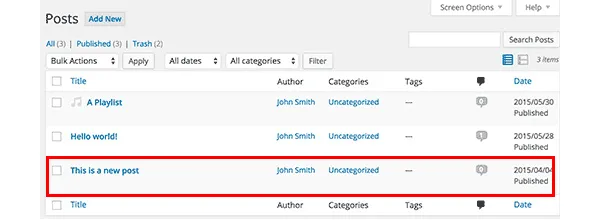
หากคุณมักประสบปัญหาในการหาโพสต์ในฟีดของคุณ คุณสามารถค้นหาได้โดยใช้การวนซ้ำ เป็นไปได้โดยการใส่รหัสต่อไปนี้ที่ทำให้การค้นหาง่ายมาก โดยเฉพาะอย่างยิ่ง จะดึงรายการที่โพสต์ระหว่างวันที่คุณระบุตัวเอง
<?php
  function filter_where($where = '') {
        $where .= " AND post_date >= '2012-08-19' AND post_date <= '2012-08-11'";
    return $where;
  }
add_filter('posts_where', 'filter_where');
query_posts($query_string);
while (have_posts()) :
      the_post();
      the_content();
endwhile;

?>
#7. แสดงภาพวนซ้ำ
แกลเลอรีรูปภาพในหน้าเริ่มต้นของเว็บไซต์ WordPress เป็นความคิดที่ดี เนื่องจากคนส่วนใหญ่ชื่นชอบภาพ หากโพสต์ของคุณมีภาพลูกค้าเป้าหมาย โค้ดด้านล่างจะดึงข้อมูลเพื่อแสดงเป็นวง
ใส่รหัสต่อไปนี้ลงในไฟล์ functions.php:
function catch_that_image() {
  global $post, $posts;
  $first_img = '';
  ob_start();
  ob_end_clean();
  $output = preg_match_all('/<img.+src=['"]([^'"]+)['"].*>/i', $post->post_content, $matches);
  $first_img = $matches [1] [0];

  if(empty($first_img)){ //Determines a default image
    $first_img = "/images/default.jpg";
  }
  return $first_img;
}
#8. ลบโพสต์โดยอัตโนมัติโดยกำหนดวันหมดอายุ
สมมติว่าคุณกำลังจัดการแข่งขันเพื่อเพิ่มจำนวนผู้อ่านในบล็อกของคุณ เมื่อการแข่งขันเสร็จสิ้น คุณจะเผยแพร่ผลลัพธ์ และที่สำคัญที่สุดคือ คำตอบ หรือคำใบ้ และเงื่อนงำสำหรับพวกเขา แน่นอนว่าผู้อ่านไม่ควรจะเข้าถึงได้ตลอดไปเพราะคุณอาจจะจัดการแข่งขันใหม่ในอนาคตใช่ไหม
วิธีที่ดีในการลบโพสต์แม้ว่าคุณจะลืมโพสต์ไปแล้ว ก็คือการตั้งเวลาโดยกำหนดวันหมดอายุ ลูปด้านล่างแทนที่อันที่มีอยู่ของคุณและทำอย่างนั้น
อย่าลืมใช้รูปแบบ mm/dd/yyyy 00:00:00 เพื่อแทนที่เวลาหมดอายุ
<?php
if (have_posts()) :
while (have_posts()) : the_post(); ?>
$expirationtime = get_post_custom_values('expiration');
if (is_array($expirationtime)) {
$expirestring = implode($expirationtime);
}

$secondsbetween = strtotime($expirestring)-time();
if ( $secondsbetween > 0 ) {
// For example…
the_title();
the_excerpt();
}
endwhile;
endif;
?>
#9. แยกความคิดเห็นออกจาก Trackbacks

รายการยอดนิยมในบล็อกของคุณจะถูกเชื่อมโยงจากเว็บไซต์อื่นๆ มากมาย เพื่อให้แน่ใจว่าผู้อ่านสามารถติดตามการสนทนาในส่วนความคิดเห็นได้อย่างสะดวกสบาย คุณควรแยกความคิดเห็นและการติดตามผล
สิ่งที่คุณต้องทำคือเปิด comments.php แล้วมองหาสิ่งต่อไปนี้:
foreach ($comments as $comment) : ?>
// Comments are displayed here
endforeach;
พบมัน? เยี่ยมมาก ตอนนี้แทนที่ด้วยรหัสใหม่:
<ul class="commentlist">
<?php //Displays comments only
foreach ($comments as $comment) : ?>
<?php $comment_type = get_comment_type(); ?>
<?php if($comment_type == 'comment') { ?>
<li>//Comment code goes here</li>
<?php }
endforeach;
</ul>

<ul>
<?php //Displays trackbacks only
foreach ($comments as $comment) : ?>
<?php $comment_type = get_comment_type(); ?>
<?php if($comment_type != 'comment') { ?>
<li><?php comment_author_link() ?></li>
<?php }
endforeach;

</ul>

#10. แสดงกระทู้ที่เกี่ยวข้อง

การแสดงบทความที่เกี่ยวข้องเป็นวิธีที่ดีในการเพิ่มจำนวนผู้อ่าน สิ่งที่คุณต้องทำคือวางโค้ดพิเศษลงในไฟล์ single.php
<?php
  $backup = $post;  // backup the current object
  $tags = ks29so_get_post_tags($post->ID);
  $tagIDs = array();
  if ($tags) {
    $tagcount = count($tags);
    for ($i = 0; $i < $tagcount; $i++) {
      $tagIDs[$i] = $tags[$i]->term_id;
    }
    $args=array(
      'tag__in' => $tagIDs,
      'post__not_in' => array($post->ID),
      'showposts'=>5,
      'caller_get_posts'=>1
    );
    $my_query = new WP_Query($args);
    if( $my_query->have_posts() ) {
      while ($my_query->have_posts()) : $my_query->the_post(); ?>
        <h3><a href="<?php the_permalink() ?>" rel="bookmark" title="<?php the_title(); ?>"><?php the_title(); ?></a></h3>
      <?php endwhile;
    } else { ?>
      <h2>No related posts found!</h2>
    <?php }
  }
  $post = $backup;  // copy it back
  ks29so_reset_query(); // to use the original query again
?>
#11. กำหนดวิธีการแสดงโพสต์เฉพาะบนโฮมเพจ
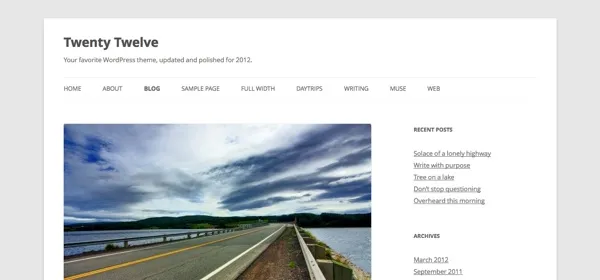
ธีม WordPress ส่วนใหญ่แสดงโพสต์ทั้งหมดในลักษณะเดียวกันในหน้าเริ่มต้น อย่างไรก็ตาม หากคุณไม่ชอบมัน คุณสามารถเปลี่ยนมันและกำหนดได้ว่าอันไหนควรแสดงทั้งหมดและส่วนใดที่ตัดตอนมาเท่านั้นก็เพียงพอ
ค้นหาไฟล์ index.php และค้นหาลูปที่นั่น รหัสต่อไปนี้แทนที่:
<?php if (have_posts()) :
    while (have_posts()) : the_post();
         $customField = get_post_custom_values("full");
         if (isset($customField[0])) {
             //Custom field is set, display a full post
              the_title();
              the_content();
         } else {
             // No custom field set, lets display an excerpt
              the_title();
              the_excerpt();
    endwhile;
endif;
?>
#12. แสดงเนื้อหาส่งเสริมการขายเหนือโพสต์ในหน้าแรก
ใส่รหัสต่อไปนี้ในไฟล์ index.php เพื่อเพิ่มเนื้อหาส่งเสริมการขาย
<div class="content-loop">
#13. แสดงรายการผู้เขียนบล็อกทั้งหมดในเพจ

เพียงวางโค้ดนี้ที่ใดก็ได้ในลูปเพื่อแสดงรายชื่อผู้เขียนทั้งหมด
<ul>
<?php ks29so_list_authors('exclude_admin=0&optioncount=1&show_fullname=1&hide_empty=1'); ?>
</ul>
#14. ใช้ฟิลด์กำหนดเองเพื่อแสดงชื่อผู้เขียนรับเชิญ
หากคุณใช้ผู้เขียนรับเชิญในบล็อกของคุณ เป็นไปได้มากที่คุณไม่ได้สร้างหน้าแยกต่างหากสำหรับพวกเขา ทำไมไม่เพียงแค่แสดงชื่อของพวกเขาแทน?
ใส่รหัสนี้ใน single.php เพื่อทำ:
<?php $author = get_post_meta($post->ID, "guest-author", true);
if ($author != "") {
echo $author;
} else {
the_author();
} ?>
#15. ทำให้รูปภาพเป็นข้อกำหนดบังคับสำหรับการเผยแพร่
โพสต์ที่มีรูปภาพมักจะมีการดูมากกว่าโพสต์ที่ไม่มีรูปภาพ เปิดไฟล์ functions.php ของคุณเพื่อกำหนดให้เป็นไฟล์บังคับ
add_action('save_post', 'wpds_check_thumbnail');
add_action('admin_notices', 'wpds_thumbnail_error');

function wpds_check_thumbnail( $post_id ) {
 // change to any custom post type
  if( get_post_type($post_id) != 'post' )
      return;

  if ( ! has_post_thumbnail( $post_id ) ) {
   // set a transient to show the users an admin message
    set_transient( "has_post_thumbnail", "no" );
   // unhook this function so it doesn't loop infinitely
    remove_action('save_post', 'wpds_check_thumbnail');
   // update the post set it to draft
    ks29so_update_post(array('ID' => $post_id, 'post_status' => 'draft'));

    add_action('save_post', 'wpds_check_thumbnail');
  } else {
    delete_transient( "has_post_thumbnail" );
  }
}

function wpds_thumbnail_error() {
 // check if the transient is set, and display the error message
  if ( get_transient( "has_post_thumbnail" ) == "no" ) {
    echo "<div class='error'><p><strong>You must add a Featured Image before publishing this. Don't panic, your post is saved.</strong></p></div>";
    delete_transient( "has_post_thumbnail" );
  }
}
#16. เปลี่ยนเส้นทางไปยังหน้าเฉพาะหลังจากการลงทะเบียน
เปิดไฟล์ functions.php และเพิ่มโค้ดด้านล่าง
function __my_registration_redirect(){
    return home_url( '/my-page' );
}
add_filter( 'registration_redirect', '__my_registration_redirect' );

#17. Insert Ads in Post
Use this code in your functions.php file to wrap ads in a post in any place you want.
Hack
function googleadsense($content){
  $adsensecode = 'Your Ad Codes Here';
  $pattern = '<!-googlead->';
  $content = str_replace($pattern, $adsensecode, $content);
  return $content;
}
add_filter('the_content', 'googleadsense');
#18. ใช้รหัสย่อเพื่อแสดงโฆษณา
เลือกตำแหน่งที่คุณต้องการแทรกโฆษณาและวางโค้ดต่อไปนี้ลงใน functions.php
function showads() {
    return '
AD’S CODE HERE
';
}
add_shortcode('adsense', 'showads');
#19. แสดงกระทู้ที่มีความคิดเห็นมากที่สุด

เพิ่มรหัสต่อไปนี้ในไฟล์ functions.php เพื่อแสดงโพสต์ที่มีความคิดเห็นมากที่สุด
function wpb_most_commented_posts() {
ob_start();?>
<ul class="most-commented">
<?php
$query = new
WP_Query('orderby=comment_count&posts_per_page=10');
while($query->have_posts()) : $query->the_post(); ?>
<li><a href="<?php the_permalink(); ?>" title="<?php the_title(); ?>"><?php the_title(); ?></a> <span class="wpb-comment-count"><?php comments_popup_link('No Comments;', '1 Comment', '% Comments'); ?></span></li>
<?php endwhile; ?>
</ul>
<?php// Turn off output buffering
$output = ob_get_clean();
return $output; }
add_shortcode('wpb_most_commented', 'wpb_most_commented_posts');
add_filter('widget_text', 'do_shortcode');
#20. เปิดใช้งานการสนับสนุนรูปภาพเด่น
ธีม WordPress ส่วนใหญ่รองรับรูปภาพเด่น แต่ถ้าธีมของคุณไม่รองรับ คุณสามารถเปิดใช้งานได้โดยแทรกสิ่งนี้ลงในไฟล์ functions.php
add_theme_support( 'post-thumbnails' );
#21. แสดงความเห็นล่าสุด
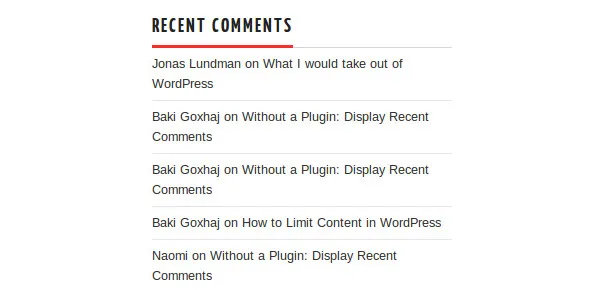
ใช้รหัสนี้ที่ใดก็ได้ในลูปเพื่อแสดงความคิดเห็นล่าสุดห้ารายการ
<?php
$query = "SELECT * from $wpdb->comments WHERE comment_approved= '1'
ORDER BY comment_date DESC LIMIT 0 ,5";
$comments = $wpdb->get_results($query);
if ($comments) {
echo '<ul>';
foreach ($comments as $comment) {
$url = '<a href="'. get_permalink($comment->comment_post_ID).'#comment-'.$comment->comment_ID .'" title="'.$comment->comment_author .' | '.get_the_title($comment->comment_post_ID).'">';
echo '<li>';
echo '<div class="img">';
echo $url;
echo get_avatar( $comment->comment_author_email, $img_w);
echo '</a></div>';
echo '<div class="txt">Par: ';
echo $url;
echo $comment->comment_author;
echo '</a></div>';
echo '</li>';
}
echo '</ul>';
}
?>
พร้อมที่จะแฮ็ค?
ใช้การปรับแต่งที่มีประโยชน์เหล่านี้และปรับปรุงฟังก์ชันการทำงานของไซต์ WordPress ของคุณ!
