
การใช้ GraphQL ขั้นสูงในเว็บไซต์ Gatsby
เผยแพร่แล้ว: 2022-03-10ก่อนการเปิดตัว GraphQL ในปี 2015 Representational State Transfer (REST) เป็นวิธีหลักในการติดต่อกับ API การเปิดตัว GraphQL จึงเป็นการเปลี่ยนแปลงครั้งสำคัญในการพัฒนาซอฟต์แวร์
ในฐานะเครื่องมือสร้างไซต์สแตติกที่ทันสมัย Gatsby ใช้ประโยชน์จาก GraphQL เพื่อให้วิธีการที่รัดกุมในการนำและจัดการข้อมูลเข้าสู่เฟรมเวิร์ก ในบทความนี้ เราจะเจาะลึกถึง GraphQL และวิธีที่เราสามารถรวมเข้ากับเว็บไซต์ Gatsby โดยการสร้างและใช้งานการจัดหาและการแปลงข้อมูลขั้นสูงใน Gatsby ผลที่ได้คือบล็อกของผู้จัดพิมพ์ที่บริษัทผู้เผยแพร่โฆษณาสามารถใช้เพื่อแบ่งปันเนื้อหาของผู้เขียนได้
GraphQL คืออะไร?
การใช้ QL ในชื่อนั้น GraphQL เป็น ภาษา คิวรีที่รวมกับชุดเครื่องมือที่สร้างขึ้นเพื่อให้มีความยืดหยุ่นและประสิทธิภาพในการดึงข้อมูลจากแหล่งที่มา ด้วย GraphQL ลูกค้า/ผู้บริโภคสามารถขอข้อมูลที่ต้องการได้อย่างแม่นยำ เซิร์ฟเวอร์/ผู้ให้บริการตอบสนองด้วยลายเซ็นตอบกลับ JSON ที่ตรงกับข้อกำหนดที่ระบุในแบบสอบถาม ช่วยให้เราสามารถแสดงความต้องการข้อมูลของเราอย่างเปิดเผย
ทำไมต้องใช้ GraphQL?
ในฐานะที่เป็นเครื่องสร้างไซต์แบบสแตติก Gatsby จะจัดเก็บไฟล์แบบสแตติก ซึ่งทำให้การสืบค้นข้อมูลแทบจะเป็นไปไม่ได้เลย มักจะมีองค์ประกอบของหน้าที่จะต้องเป็นไดนามิกเหมือนหน้าโพสต์บล็อกเดียว ดังนั้นความจำเป็นในการดึงข้อมูลจากแหล่งที่มาและแปลงเป็นรูปแบบที่ต้องการก็จะเกิดขึ้น เช่นเดียวกับการมีบล็อกโพสต์ที่เก็บไว้ในไฟล์มาร์กดาวน์ ปลั๊กอินบางตัวมีข้อมูลจากแหล่งต่างๆ ซึ่งทำให้คุณต้องสืบค้นและแปลงข้อมูลที่ต้องการจากแหล่งที่มา
ตามรายการใน gatsby.org GraphQL มีประโยชน์ใน Gatsby เพื่อ:
- กำจัดต้นแบบ
- ผลักดันความซับซ้อนของฟรอนต์เอนด์ลงในคิวรี
- มอบโซลูชันที่สมบูรณ์แบบสำหรับข้อมูลที่ซับซ้อนอยู่เสมอของแอปพลิเคชันยุคใหม่
- สุดท้าย เพื่อลบโค้ดที่บวม ซึ่งจะช่วยปรับปรุงประสิทธิภาพ
แนวคิด GraphQL
Gatsby รักษาแนวคิดเดียวกันกับ GraphQL ที่ใช้กันอย่างแพร่หลาย บางส่วนของแนวคิดเหล่านี้คือ:
สคีมา คำจำกัดความ ภาษา
GraphQL SDL เป็นระบบประเภทที่รวมอยู่ใน GraphQL และคุณสามารถใช้เพื่อสร้างประเภทใหม่สำหรับข้อมูลของคุณ
เราสามารถประกาศประเภทสำหรับประเทศหนึ่งๆ และคุณลักษณะของมันสามารถรวมถึงชื่อ ทวีป ประชากร จีดีพี และจำนวนรัฐ
จากตัวอย่างด้านล่าง เราได้สร้างประเภทใหม่โดยใช้ชื่อ Aleem มี hobbies ที่เป็นอาร์เรย์ของสตริงและไม่จำเป็น แต่ต้องมีประเทศ สถานภาพการสมรส และโพสต์ เนื่องจาก ! รวมถึงโพสต์อ้างอิงอีกประเภทหนึ่ง โพสต์
type Author { name: String!, hobbies: [String] country: String! married: Boolean! posts: [Post!] } type Post { title: String! body: String! } type Query { author: Author } schema { query: Query }แบบสอบถาม
เราสามารถใช้ Queries เพื่อดึงข้อมูลจากแหล่ง GraphQL
พิจารณาชุดข้อมูลดังนี้
{ data: { author: [ { hobbies: ["travelling", "reading"], married: false, country: "Nigeria", name: "Aleem Isiaka", posts: [ { title: "Learn more about how to improve your Gatsby website", }, { title: "The ultimate guide to GatsbyJS", }, { title: "How to start a blog with only GatsbyJS", }, ], }, ], }, };เราสามารถมีคำถามที่จะดึงข้อมูลประเทศและโพสต์จากข้อมูล:
query { authors { country, posts { title } } }คำตอบที่เราจะได้รับควรมีข้อมูล JSON ของบล็อกโพสต์ที่มีเพียงชื่อเท่านั้นและไม่มีอะไรเพิ่มเติม:
[ { country: “Nigeria”, posts: [{...}, {...}, {...}] }, { country: “Tunisia”, posts: [] }, { title: “Ghana”, posts: []}, ]เรายังสามารถใช้อาร์กิวเมนต์เป็นเงื่อนไขสำหรับแบบสอบถาม:
query { authors (country: “Nigeria”) { country, posts { title } } }ที่ควรกลับมา
[ { country: “Nigeria”, posts: [{...}, {...}, {...}] } ]ฟิลด์ที่ซ้อนกันสามารถสอบถามได้ เช่นเดียวกับโพสต์ที่มีประเภทโพสต์ คุณสามารถขอแค่ชื่อเรื่องได้:
query { authors(country: 'Nigeria') { country, posts { title } } }และควรส่งคืนประเภทผู้แต่งที่ตรงกับ ไนจีเรีย ที่ส่งคืนประเทศและอาร์เรย์โพสต์ที่มีวัตถุที่มีเพียงฟิลด์ชื่อเรื่อง
แกสบี้กับ GraphQL
เพื่อหลีกเลี่ยงค่าใช้จ่ายของการมีเซิร์ฟเวอร์/บริการที่ให้บริการข้อมูลที่ GraphQL สามารถแปลงได้ Gatsby จะดำเนินการสืบค้นข้อมูล GraphQL ณ เวลาสร้าง ข้อมูลถูกจัดเตรียมให้กับส่วนประกอบต่างๆ ในระหว่างกระบวนการสร้าง ทำให้พร้อมใช้งานภายในเบราว์เซอร์โดยไม่ต้องใช้เซิร์ฟเวอร์
อย่างไรก็ตาม Gatsby สามารถทำงานเป็นเซิร์ฟเวอร์ที่ไคลเอ็นต์ GraphQL อื่นสามารถสอบถาม เช่น GraphiQL ในเบราว์เซอร์ได้
Gatsby วิธีการโต้ตอบกับ GraphQL
มีสองที่ที่ Gatsby สามารถโต้ตอบกับ GraphQL ผ่านไฟล์ API gatsby-node.js และผ่านองค์ประกอบของหน้า
gatsby-node.js
CreatePage API สามารถกำหนดค่าเป็นฟังก์ชันซึ่งจะได้รับตัวช่วย graphql ซึ่งเป็นส่วนหนึ่งของรายการในอาร์กิวเมนต์แรกที่ส่งผ่านไปยังฟังก์ชัน
// gatsby-node.js source: https://www.gatsbyjs.org/docs/node-apis/#createPages exports.createPages = async ({ graphql, actions }) => { const result = await graphql(` query loadPagesQuery ($limit: Int!) { allMarkdownRemark(limit: $limit) { edges { node { frontmatter { slug } } } } }`) }ในโค้ดด้านบนนี้ เราได้ใช้ตัวช่วย GraphQL เพื่อดึงไฟล์ markdown จากชั้นข้อมูลของ Gatsby และเราสามารถฉีดสิ่งนี้เพื่อสร้างเพจและแก้ไขข้อมูลที่มีอยู่ภายในชั้นข้อมูล Gatsby
ส่วนประกอบของหน้า
ส่วนประกอบของหน้าภายในไดเร็กทอรี /pages หรือเทมเพลตที่แสดงผลโดยการทำงาน createPage API สามารถนำเข้า graphql จากโมดูล gatsby และส่งออก pageQuery ในทางกลับกัน Gatsby จะใส่ data อุปกรณ์ประกอบฉากใหม่ลงในอุปกรณ์ประกอบฉากขององค์ประกอบหน้าที่มีข้อมูลที่แก้ไขแล้ว
import React from "react"; import { graphql } from "gatsby"; const Page = props => { return{JSON.stringify(props.data)}; }; ส่งออก const pageQuery = graphql` แบบสอบถาม { ... } `; ส่งออกหน้าเริ่มต้น;
ในส่วนประกอบอื่นๆ
ส่วนประกอบอื่นๆ สามารถนำเข้าส่วนประกอบ graphql และ StaticQuery จากโมดูล gatsby แสดงผล <StaticQuery/> ผ่านอุปกรณ์ประกอบการสืบค้นที่ใช้ตัวช่วย Graphql และแสดงผลเพื่อรับข้อมูลที่ส่งคืน
import React from "react"; import { StaticQuery, graphql } from "gatsby"; const Brand = props => { return ( <div> <h1>{data.site.siteMetadata.title}</h1> </div> ); }; const Navbar = props => { return ( <StaticQuery query={graphql` query { site { siteMetadata { title } } } `} render={data => <Brand data={data} {...props} />} /> ); }; export default Navbar;การสร้างบล็อกการเผยแพร่ Gatsby ที่ทันสมัยและล้ำสมัย
ในส่วนนี้ เราจะอธิบายขั้นตอนการสร้างบล็อกที่สนับสนุนการแท็ก การจัดหมวดหมู่ การแบ่งหน้า และการจัดกลุ่มบทความโดยผู้เขียน เราจะใช้ปลั๊กอินของระบบนิเวศของ Gatsby เพื่อนำคุณลักษณะบางอย่างมาใช้ และใช้ตรรกะในการสืบค้น GraphQL เพื่อสร้างบล็อกของผู้เผยแพร่ที่พร้อมสำหรับการตีพิมพ์ของผู้เขียนหลายคน
เวอร์ชันสุดท้ายของบล็อกที่เราจะสร้างสามารถพบได้ที่นี่ นอกจากนี้โค้ดยังโฮสต์อยู่บน Github
การเริ่มต้นโครงการ
เช่นเดียวกับเว็บไซต์ Gatsby ใดๆ เราเริ่มต้นจากผู้เริ่มต้น ที่นี่เราจะใช้ตัวเริ่มต้นขั้นสูง แต่ได้รับการแก้ไขเพื่อรองรับกรณีการใช้งานของเรา
ขั้นแรกให้โคลน repo Github นี้ เปลี่ยนสาขาการทำงานเป็น dev-init จากนั้นรัน npm run develop จากโฟลเดอร์ของโปรเจ็กต์เพื่อเริ่มเซิร์ฟเวอร์การพัฒนาที่ทำให้ไซต์พร้อมใช้งานที่ https://localhost:8000
git clone [email protected]:limistah/modern-gatsby-starter.git cd modern-gatsby-starter git checkout dev-init npm install npm run developการเยี่ยมชม https://localhost:8000 จะแสดงหน้าแรกเริ่มต้นสำหรับสาขานี้
การสร้างเนื้อหาโพสต์บล็อก
เนื้อหาโพสต์บางส่วนที่รวมอยู่ในที่เก็บโครงการสามารถเข้าถึงได้ที่สาขา dev-blog-content การจัดระเบียบของไดเร็กทอรีเนื้อหามีลักษณะดังนี้ /content/YYYY_MM/DD.md ซึ่งกลุ่มจะโพสต์ตามเดือนที่สร้างในหนึ่งปี
เนื้อหาโพสต์ในบล็อกมี title , date , author , category , tags เป็นส่วนหน้า ซึ่งเราจะใช้เพื่อแยกแยะโพสต์และดำเนินการต่อไป ในขณะที่เนื้อหาที่เหลือจะเป็นเนื้อหาของโพสต์
title: "Bold Mage" date: "2020-07-12" author: "Tunde Isiaka" category: "tech" tags: - programming - stuff - Ice cream - other --- # Donut I love macaroon chocolate bar Oat cake marshmallow lollipop fruitcake I love jelly-o. Gummi bears cake wafer chocolate bar pie. Marshmallow pastry powder chocolate cake candy chupa chups. Jelly beans powder souffle biscuit pie macaroon chocolate cake. Marzipan lemon drops chupa chups sweet cookie sesame snaps jelly halvah.การแสดงเนื้อหาโพสต์
ก่อนที่เราจะสามารถแสดงโพสต์ Markdown ของเราใน HTML เราต้องดำเนินการบางอย่างก่อน ขั้นแรก โหลดไฟล์ลงในที่เก็บข้อมูล Gatsby แยกวิเคราะห์ MD เป็น HTML เชื่อมโยงการขึ้นต่อกันของรูปภาพ และการชอบ เพื่อลดปัญหานี้ เราจะใช้ปลั๊กอินจำนวนมากโดยระบบนิเวศของ Gatsby
เราสามารถใช้ปลั๊กอินเหล่านี้ได้โดยอัปเดต gatsby-config.js ที่รูทของโปรเจ็กต์ให้มีลักษณะดังนี้:
module.exports = { siteMetadata: {}, plugins: [ { resolve: "gatsby-source-filesystem", options: { name: "assets", path: `${__dirname}/static/`, }, }, { resolve: "gatsby-source-filesystem", options: { name: "posts", path: `${__dirname}/content/`, }, }, { resolve: "gatsby-transformer-remark", options: { plugins: [ { resolve: `gatsby-remark-relative-images`, }, { resolve: "gatsby-remark-images", options: { maxWidth: 690, }, }, { resolve: "gatsby-remark-responsive-iframe", }, "gatsby-remark-copy-linked-files", "gatsby-remark-autolink-headers", "gatsby-remark-prismjs", ], }, }, ], };เราได้สั่งให้แกสบี้รวมปลั๊กอินเพื่อช่วยเราในการดำเนินการบางอย่าง โดยเฉพาะอย่างยิ่งการดึงไฟล์จากโฟลเดอร์ /static สำหรับไฟล์คงที่และ /content สำหรับโพสต์บล็อกของเรา นอกจากนี้ เราได้รวมปลั๊กอินหม้อแปลงหมายเหตุเพื่อแปลงไฟล์ทั้งหมดที่ลงท้ายด้วย .md หรือ .markdown เป็นโหนดที่มีฟิลด์หมายเหตุทั้งหมดสำหรับการแสดงมาร์กดาวน์เป็น HTML
สุดท้าย เราได้รวมปลั๊กอินในการทำงานบนโหนดที่สร้างโดย gatsby-transformer-remark
การใช้งานไฟล์ API gatsby-config.js
ไปข้างหน้า ภายใน gatsby-node.js ในรูทโปรเจ็กต์ เราสามารถส่งออกฟังก์ชันที่ชื่อ createPage และมีเนื้อหาของฟังก์ชันเพื่อใช้ตัวช่วย graphQL เพื่อดึงโหนดจากเลเยอร์เนื้อหาของ GatsbyJS
การอัปเดตครั้งแรกของหน้านี้รวมถึงการตรวจสอบว่าเราได้ตั้งค่ากระสุนบนโหนดหมายเหตุของ MarkDown เราจะฟัง onCreateNode API และรับโหนดที่สร้างขึ้นเพื่อพิจารณาว่าเป็นประเภทของ MarkdownRemark ก่อนที่เราจะอัปเดตโหนดเพื่อรวมกระสุนและวันที่ตามนั้น
const path = require("path"); const _ = require("lodash"); const moment = require("moment"); const config = require("./config"); // Called each time a new node is created exports.onCreateNode = ({ node, actions, getNode }) => { // A Gatsby API action to add a new field to a node const { createNodeField } = actions; // The field that would be included let slug; // The currently created node is a MarkdownRemark type if (node.internal.type === "MarkdownRemark") { // Recall, we are using gatsby-source-filesystem? // This pulls the parent(File) node, // instead of the current MarkdownRemark node const fileNode = getNode(node.parent); const parsedFilePath = path.parse(fileNode.relativePath); if ( Object.prototype.hasOwnProperty.call(node, "frontmatter") && Object.prototype.hasOwnProperty.call(node.frontmatter, "title") ) { // The node is a valid remark type and has a title, // Use the title as the slug for the node. slug = `/${_.kebabCase(node.frontmatter.title)}`; } else if (parsedFilePath.name !== "index" && parsedFilePath.dir !== "") { // File is in a directory and the name is not index // eg content/2020_02/learner/post.md slug = `/${parsedFilePath.dir}/${parsedFilePath.name}/`; } else if (parsedFilePath.dir === "") { // File is not in a subdirectory slug = `/${parsedFilePath.name}/`; } else { // File is in a subdirectory, and name of the file is index // eg content/2020_02/learner/index.md slug = `/${parsedFilePath.dir}/`; } if (Object.prototype.hasOwnProperty.call(node, "frontmatter")) { if (Object.prototype.hasOwnProperty.call(node.frontmatter, "slug")) slug = `/${_.kebabCase(node.frontmatter.slug)}`; if (Object.prototype.hasOwnProperty.call(node.frontmatter, "date")) { const date = moment(new Date(node.frontmatter.date), "DD/MM/YYYY"); if (!date.isValid) console.warn(`WARNING: Invalid date.`, node.frontmatter); // MarkdownRemark does not include date by default createNodeField({ node, name: "date", value: date.toISOString() }); } } createNodeField({ node, name: "slug", value: slug }); } };The Post Listing
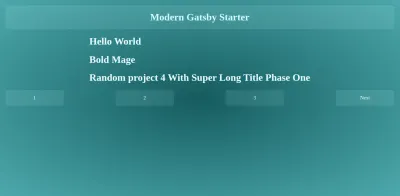
ณ จุดนี้ เราสามารถใช้ createPages API เพื่อสืบค้นการมาร์กดาวน์ทั้งหมด และสร้างเพจที่มีพาธเป็นทากที่เราสร้างไว้ด้านบน ดูมันบน Github
//gatsby-node.js // previous code // Create Pages Programatically! exports.createPages = async ({ graphql, actions }) => { // Pulls the createPage action from the Actions API const { createPage } = actions; // Template to use to render the post converted HTML const postPage = path.resolve("./src/templates/singlePost/index.js"); // Get all the markdown parsed through the help of gatsby-source-filesystem and gatsby-transformer-remark const allMarkdownResult = await graphql(` { allMarkdownRemark { edges { node { fields { slug } frontmatter { title tags category date author } } } } } `); // Throws if any error occur while fetching the markdown files if (allMarkdownResult.errors) { console.error(allMarkdownResult.errors); throw allMarkdownResult.errors; } // Items/Details are stored inside of edges const postsEdges = allMarkdownResult.data.allMarkdownRemark.edges; // Sort posts postsEdges.sort((postA, postB) => { const dateA = moment( postA.node.frontmatter.date, siteConfig.dateFromFormat ); const dateB = moment( postB.node.frontmatter.date, siteConfig.dateFromFormat ); if (dateA.isBefore(dateB)) return 1; if (dateB.isBefore(dateA)) return -1; return 0; }); // Pagination Support for posts const paginatedListingTemplate = path.resolve( "./src/templates/paginatedListing/index.js" ); const { postsPerPage } = config; if (postsPerPage) { // Get the number of pages that can be accommodated const pageCount = Math.ceil(postsEdges.length / postsPerPage); // Creates an empty array Array.from({ length: pageCount }).forEach((__value__, index) => { const pageNumber = index + 1; createPage({ path: index === 0 ? `/posts` : `/posts/${pageNumber}/`, component: paginatedListingTemplate, context: { limit: postsPerPage, skip: index * postsPerPage, pageCount, currentPageNumber: pageNumber, }, }); }); } else { // Load the landing page instead createPage({ path: `/`, component: landingPage, }); } }; ในฟังก์ชัน createPages เราใช้ตัวช่วย graphql ที่ Gatsby จัดเตรียมไว้ให้เพื่อสืบค้นข้อมูลจากชั้นเนื้อหา เราใช้การสืบค้น Graphql มาตรฐานเพื่อทำสิ่งนี้และส่งแบบสอบถามเพื่อรับเนื้อหาจากประเภท allMarkdownRemark แล้วเลื่อนไปข้างหน้าเพื่อจัดเรียงโพสต์ตามวันที่สร้าง
จากนั้นเราดึงคุณสมบัติ postPerPage จากออบเจ็กต์ config ที่นำเข้า ซึ่งใช้เพื่อแบ่งโพสต์ทั้งหมดเป็นจำนวนโพสต์ที่ระบุสำหรับหน้าเดียว

ในการสร้างหน้ารายการที่รองรับการแบ่งหน้า เราจำเป็นต้องส่งผ่านขีดจำกัด หมายเลขหน้า และจำนวนหน้าเพื่อข้ามไปยังองค์ประกอบที่จะแสดงรายการ เรากำลังบรรลุสิ่งนี้โดยใช้คุณสมบัติบริบทของ createPage config เราจะเข้าถึงคุณสมบัติเหล่านี้จากหน้าเพื่อสร้างแบบสอบถาม graphql อื่นเพื่อดึงข้อมูลโพสต์ภายในขีดจำกัด
นอกจากนี้เรายังสามารถสังเกตได้ว่าเราใช้องค์ประกอบเทมเพลตเดียวกันสำหรับรายการ และมีเพียงเส้นทางเท่านั้นที่เปลี่ยนแปลงโดยใช้ดัชนีของอาร์เรย์กลุ่มที่เราได้กำหนดไว้ล่วงหน้า Gatsby จะส่งข้อมูลที่จำเป็นสำหรับการจับคู่ URL ที่ระบุ /{chunkIndex} เพื่อให้เราสามารถมี / สำหรับ 10 โพสต์แรก และ /2 สำหรับ 10 โพสต์ถัดไป
การแสดงผลรายการโพสต์
ส่วนประกอบที่แสดงหน้าเหล่านี้สามารถพบได้ที่ src/templates/singlePost/index.js ของโฟลเดอร์โครงการ นอกจากนี้ยังส่งออกตัวช่วย graphql ซึ่งดึงขีดจำกัดและพารามิเตอร์การสืบค้นหน้าเว็บที่ได้รับจากกระบวนการ createPages เพื่อสอบถาม gatsby สำหรับโพสต์ภายในช่วงของหน้าปัจจุบัน
import React from "react"; import { graphql, Link } from "gatsby"; import Layout from "../../layout"; import PostListing from "../../components/PostListing"; import "./index.css"; const Pagination = ({ currentPageNum, pageCount }) => { const prevPage = currentPageNum - 1 === 1 ? "/" : `/${currentPageNum - 1}/`; const nextPage = `/${currentPageNum + 1}/`; const isFirstPage = currentPageNum === 1; const isLastPage = currentPageNum === pageCount; return ( <div className="paging-container"> {!isFirstPage && <Link to={prevPage}>Previous</Link>} {[...Array(pageCount)].map((_val, index) => { const pageNum = index + 1; return ( <Link key={`listing-page-${pageNum}`} to={pageNum === 1 ? "/" : `/${pageNum}/`} > {pageNum} </Link> ); })} {!isLastPage && <Link to={nextPage}>Next</Link>} </div> ); }; export default (props) => { const { data, pageContext } = props; const postEdges = data.allMarkdownRemark.edges; const { currentPageNum, pageCount } = pageContext; return ( <Layout> <div className="listing-container"> <div className="posts-container"> <PostListing postEdges={postEdges} /> </div> <Pagination pageCount={pageCount} currentPageNum={currentPageNum} /> </div> </Layout> ); }; /* eslint no-undef: "off" */ export const pageQuery = graphql` query ListingQuery($skip: Int!, $limit: Int!) { allMarkdownRemark( sort: { fields: [fields___date], order: DESC } limit: $limit skip: $skip ) { edges { node { fields { slug date } excerpt timeToRead frontmatter { title tags author category date } } } } } `;หน้าโพสต์
ในการดูเนื้อหาของเพจ เราจำเป็นต้องสร้างเพจโดยทางโปรแกรมภายในไฟล์ API gatsby-node.js อันดับแรก เราต้องกำหนดองค์ประกอบใหม่เพื่อแสดงเนื้อหาด้วย สำหรับสิ่งนี้ เรามี src/templates/singlePost/index.jsx
import React from "react"; import { graphql, Link } from "gatsby"; import _ from "lodash"; import Layout from "../../layout"; import "./b16-tomorrow-dark.css"; import "./index.css"; import PostTags from "../../components/PostTags"; export default class PostTemplate extends React.Component { render() { const { data, pageContext } = this.props; const { slug } = pageContext; const postNode = data.markdownRemark; const post = postNode.frontmatter; if (!post.id) { post.id = slug; } return ( <Layout> <div> <div> <h1>{post.title}</h1> <div className="category"> Posted to{" "} <em> <Link key={post.category} style={{ textDecoration: "none" }} to={`/category/${_.kebabCase(post.category)}`} > <a>{post.category}</a> </Link> </em> </div> <PostTags tags={post.tags} /> <div dangerouslySetInnerHTML={{ __html: postNode.html }} /> </div> </div> </Layout> ); } } /* eslint no-undef: "off" */ export const pageQuery = graphql` query BlogPostBySlug($slug: String!) { markdownRemark(fields: { slug: { eq: $slug } }) { html timeToRead excerpt frontmatter { title date category tags } fields { slug date } } } `;อีกครั้ง เรากำลังใช้ตัวช่วย graphQL เพื่อดึงหน้าโดยใช้ข้อความค้นหากระสุนที่จะถูกส่งไปยังหน้าผ่าน createPages API
ต่อไป เราควรเพิ่มโค้ดด้านล่างใน gatsby-node.js ที่ส่วนท้ายของฟังก์ชัน createPages API
// Template to use to render the post converted HTML const postPage = path.resolve("./src/templates/singlePost/index.jsx"); // Loops through all the post nodes postsEdges.forEach((edge, index) => { // Create post pages createPage({ path: edge.node.fields.slug, component: postPage, context: { slug: edge.node.fields.slug, }, }); }); และเราสามารถไปที่ '/{pageSlug}' และให้มันแสดงเนื้อหาของไฟล์ markdown สำหรับหน้านั้นเป็น HTML ตัวอย่างเช่น https://localhost:8000/the-butterfly-of-the-edge ควรโหลด HTML ที่แปลงแล้วสำหรับ markdown ที่: content/2020_05/01.md คล้ายกับทากที่ถูกต้องทั้งหมด ยอดเยี่ยม!

การแสดงผลหมวดหมู่และแท็ก
องค์ประกอบเทมเพลตโพสต์เดียวมีลิงก์ไปยังหน้าในรูปแบบ /categories/{categoryName} เพื่อแสดงรายการโพสต์ที่มีหมวดหมู่ที่คล้ายกัน
อันดับแรก เราสามารถตรวจจับหมวดหมู่และแท็กทั้งหมดได้ในขณะที่เราสร้างหน้าโพสต์หน้าเดียวในไฟล์ gatsby-node.js จากนั้นสร้างหน้าสำหรับหมวดหมู่/แท็กที่จับได้แต่ละรายการ โดยส่งชื่อหมวดหมู่/แท็ก
การแก้ไขส่วนสำหรับสร้างหน้าโพสต์เดียวใน gatsby-node.js มีลักษณะดังนี้:
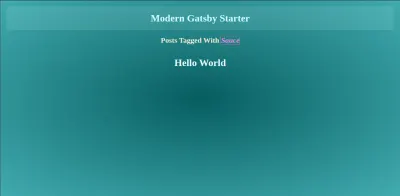
const categorySet = new Set(); const tagSet = new Set(); const categoriesListing = path.resolve( "./src/templates/categoriesListing/index.jsx" ); // Template to use to render posts based on categories const tagsListingPage = path.resolve("./src/templates/tagsListing/index.jsx"); // Loops through all the post nodes postsEdges.forEach((edge, index) => { // Generate a list of categories if (edge.node.frontmatter.category) { categorySet.add(edge.node.frontmatter.category); } // Generate a list of tags if (edge.node.frontmatter.tags) { edge.node.frontmatter.tags.forEach((tag) => { tagSet.add(tag); }); } // Create post pages createPage({ path: edge.node.fields.slug, component: postPage, context: { slug: edge.node.fields.slug, }, }); }); และภายในองค์ประกอบสำหรับการแสดงรายการโพสต์ด้วยแท็ก เราสามารถมี pageQuery แบบสอบถามการส่งออก pageQuery สำหรับโพสต์ รวมถึงแท็กนั้นในรายการแท็ก เราจะใช้ฟังก์ชัน filter ของ graphql และตัวดำเนินการ $in เพื่อให้บรรลุสิ่งนี้:
// src/templates/tagsListing/ import React from "react"; import { graphql } from "gatsby"; import Layout from "../../layout"; import PostListing from "../../components/PostListing"; export default ({ pageContext, data }) => { const { tag } = pageContext; const postEdges = data.allMarkdownRemark.edges; return ( <Layout> <div className="tag-container"> <div>Posts posted with {tag}</div> <PostListing postEdges={postEdges} /> </div> </Layout> ); }; /* eslint no-undef: "off" */ export const pageQuery = graphql` query TagPage($tag: String) { allMarkdownRemark( limit: 1000 sort: { fields: [fields___date], order: DESC } filter: { frontmatter: { tags: { in: [$tag] } } } ) { totalCount edges { node { fields { slug date } excerpt timeToRead frontmatter { title tags author date } } } } } `;และเรามีกระบวนการเดียวกันในองค์ประกอบรายการหมวดหมู่ และความแตกต่างก็คือเราเพียงแค่ต้องค้นหาว่าหมวดหมู่ใดที่ตรงกับสิ่งที่เราส่งไป
// src/templates/categoriesListing/index.jsx import React from "react"; import { graphql } from "gatsby"; import Layout from "../../layout"; import PostListing from "../../components/PostListing"; export default ({ pageContext, data }) => { const { category } = pageContext; const postEdges = data.allMarkdownRemark.edges; return ( <Layout> <div className="category-container"> <div>Posts posted to {category}</div> <PostListing postEdges={postEdges} /> </div> </Layout> ); }; /* eslint no-undef: "off" */ export const pageQuery = graphql` query CategoryPage($category: String) { allMarkdownRemark( limit: 1000 sort: { fields: [fields___date], order: DESC } filter: { frontmatter: { category: { eq: $category } } } ) { totalCount edges { node { fields { slug date } excerpt timeToRead frontmatter { title tags author date } } } } } `;ที่เห็นได้ชัดเจนภายในทั้งองค์ประกอบแท็กและหมวดหมู่ เราแสดงลิงก์ไปยังหน้าโพสต์เดียวสำหรับการอ่านเนื้อหาของโพสต์เพิ่มเติม
เพิ่มการสนับสนุนสำหรับผู้เขียน
เพื่อรองรับผู้เขียนหลายคน เราต้องแก้ไขเนื้อหาโพสต์ของเราและแนะนำแนวคิดใหม่
โหลดไฟล์ JSON
อันดับแรก เราควรจะสามารถเก็บเนื้อหาของผู้เขียนในไฟล์ JSON ดังนี้:
{ "mdField": "aleem", "name": "Aleem Isiaka", "email": "[email protected]", "location": "Lagos, Nigeria", "avatar": "https://api.adorable.io/avatars/55/[email protected]", "description": "Yeah, I like animals better than people sometimes... Especially dogs. Dogs are the best. Every time you come home, they act like they haven't seen you in a year. And the good thing about dogs... is they got different dogs for different people.", "userLinks": [ { "label": "GitHub", "url": "https://github.com/limistah/modern-gatsby-starter", "iconClassName": "fa fa-github" }, { "label": "Twitter", "url": "https://twitter.com/limistah", "iconClassName": "fa fa-twitter" }, { "label": "Email", "url": "mailto:[email protected]", "iconClassName": "fa fa-envelope" } ] } เราจะเก็บไว้ในไดเร็กทอรีของผู้เขียนในรูทของโปรเจ็กต์ของเราในชื่อ /authors ขอให้สังเกตว่า JSON ผู้เขียนมี mdField ที่จะเป็นตัวระบุเฉพาะสำหรับฟิลด์ผู้เขียนที่เราจะแนะนำให้รู้จักกับเนื้อหาบล็อกของ markdown สิ่งนี้ทำให้มั่นใจได้ว่าผู้เขียนสามารถมีได้หลายโปรไฟล์
ต่อไป เราต้องอัปเดตปลั๊กอิน gatsby-config.js เพื่อสั่งให้ gatsby-source-filesystem โหลดเนื้อหาจากไดเร็กทอรี Authors authors/ ลงใน Files Node
// gatsby-config.js { resolve: `gatsby-source-filesystem`, options: { name: "authors", path: `${__dirname}/authors/`, }, } สุดท้ายนี้ เราจะติดตั้ง gatsby-transform-json เพื่อแปลงไฟล์ JSON ที่สร้างขึ้นเพื่อการจัดการที่ง่ายดายและการประมวลผลที่เหมาะสม
npm install gatsby-transformer-json --save และรวมไว้ในปลั๊กอินของ gatsby-config.js
module.exports = { plugins: [ // ...other plugins `gatsby-transformer-json` ], };การสืบค้นและการสร้างหน้าผู้เขียน
ขั้นแรก เราต้องสอบถามผู้เขียนทั้งหมดในไดเร็กทอรี Authors authors/ ของเราภายใน gatsby-config.js ที่โหลดลงในชั้นข้อมูลแล้ว เราควรผนวกโค้ดด้านล่างเข้ากับฟังก์ชัน createPages API
const authorsListingPage = path.resolve( "./src/templates/authorsListing/index.jsx" ); const allAuthorsJson = await graphql(` { allAuthorsJson { edges { node { id avatar mdField location name email description userLinks { iconClassName label url } } } } } `); const authorsEdges = allAuthorsJson.data.allAuthorsJson.edges; authorsEdges.forEach((author) => { createPage({ path: `/authors/${_.kebabCase(author.node.mdField)}/`, component: authorsListingPage, context: { authorMdField: author.node.mdField, authorDetails: author.node, }, }); }); ในข้อมูลโค้ดนี้ เรากำลังดึงผู้เขียนทั้งหมดจากประเภท allAuthorsJson จากนั้นจึงเรียก forEach บนโหนดเพื่อสร้างหน้าเว็บที่เราส่งผ่าน mdField เพื่อแยกความแตกต่างระหว่างผู้แต่งและผู้แต่งราย authorDetails สำหรับข้อมูลทั้งหมดเกี่ยวกับผู้เขียน
การแสดงผลโพสต์ของผู้เขียน
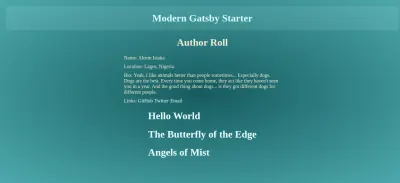
ในองค์ประกอบที่แสดงหน้าซึ่งสามารถพบได้ที่ src/templates/authorsListing/index.jsx เรามีเนื้อหาด้านล่างสำหรับไฟล์
import React from "react"; import { graphql } from "gatsby"; import Layout from "../../layout"; import PostListing from "../../components/PostListing"; import AuthorInfo from "../../components/AuthorInfo"; export default ({ pageContext, data }) => { const { authorDetails } = pageContext; const postEdges = data.allMarkdownRemark.edges; return ( <Layout> <div> <h1 style={{ textAlign: "center" }}>Author Roll</h1> <div className="category-container"> <AuthorInfo author={authorDetails} /> <PostListing postEdges={postEdges} /> </div> </div> </Layout> ); }; /* eslint no-undef: "off" */ export const pageQuery = graphql` query AuthorPage($authorMdField: String) { allMarkdownRemark( limit: 1000 sort: { fields: [fields___date], order: DESC } filter: { frontmatter: { author: { eq: $authorMdField } } } ) { totalCount edges { node { fields { slug date } excerpt timeToRead frontmatter { title tags author date } } } } } `; ในโค้ดด้านบนนี้ เราได้ส่งออก pageQuery เหมือนกับที่เราทำ เพื่อสร้างการสืบค้น GraphQL เพื่อดึงข้อมูลโพสต์ที่ตรงกับผู้เขียน เราใช้ตัวดำเนินการ $eq เพื่อสร้างลิงก์ไปยังหน้าโพสต์เดียวสำหรับการอ่านเพิ่มเติม
บทสรุป
ใน Gatsby เราสามารถสืบค้นข้อมูลใดๆ ที่มีอยู่ภายในชั้นการเข้าถึงข้อมูลด้วยการใช้การสืบค้น GraphQL และส่งผ่านตัวแปรไปรอบๆ โดยใช้โครงสร้างบางอย่างที่กำหนดโดยสถาปัตยกรรมของ Gatsby เราได้เห็นวิธีที่เราสามารถใช้ตัวช่วย graphql ในที่ต่างๆ และเข้าใจรูปแบบที่ใช้กันอย่างแพร่หลายในการสืบค้นข้อมูลในเว็บไซต์ของ Gatsby ด้วยความช่วยเหลือของ GraphQL
GraphQL มีประสิทธิภาพมากและสามารถทำสิ่งอื่น ๆ เช่น การกลายพันธุ์ของข้อมูลบนเซิร์ฟเวอร์ Gatsby ไม่จำเป็นต้องอัปเดตข้อมูลในขณะใช้งานจริง ดังนั้นจึงไม่รองรับคุณสมบัติการกลายพันธุ์ของ GraphQL
GraphQL เป็นเทคโนโลยีที่ยอดเยี่ยม และ Gatsby ทำให้มันน่าสนใจมากที่จะใช้ในกรอบงานของพวกเขา
อ้างอิง
- Gatsby รองรับ GraphQL
- เหตุใด Gatsby จึงใช้ GraphQL
- แนวคิด GraphQL ใน Gatsby
- How To GraphQL: แนวคิดพื้นฐาน
- ภาษานิยามสคีมาใน GraphQL
- บทนำสู่ GraphQL
- Gatsby Advanced Starter