20개 이상의 가장 원하는 WordPress 루프 해킹
게시 됨: 2017-12-20루프는 WordPress의 주요 프로세스이므로 거의 모든 테마 파일에서 찾을 수 있습니다. 기본적으로 플랫폼에서 테마 템플릿 파일을 통해 게시물을 표시하는 데 사용하는 PHP 코드입니다. 즉, 거대합니다. 실제로 사이트가 루프 없이는 작동하지 않기 때문에 중요합니다.
이 엄청나게 강력한 기능을 조정하면 WordPress 사이트의 기능을 향상시킬 수 있습니다. 예를 들어, 게시물이 홈페이지에 표시되는 방식을 변경하고 특정 매개변수를 사용하여 게시물을 정렬할 수 있습니다. 루프가 수정하기 가장 쉽다는 점을 감안할 때 꽤 인상적이고 창의적인 해킹을 얻을 수 있습니다.
플러그인을 설치할 필요 없이 지금 바로 사용해야 하는 20개 이상의 루프 핵을 보여드리겠습니다.
#1. 첫 번째 게시물 이후 광고 게재
블로거로서 당신은 광고가 돈을 버는 가장 좋은 방법 중 하나라는 것을 아주 잘 알고 있습니다. 방문자로부터 그렇게 많이 필요한 클릭을 얻는 것은 확실히 까다로운 일이며 많은 블로거는 높은 클릭률을 즐기지 않습니다. 첫 번째 게시물 뒤에 광고를 배치하면 광고를 늘리는 좋은 방법이 될 수 있으므로 이 간단한 조정을 시도하십시오.
루프를 아래 루프로 교체하십시오. 여기에 광고 코드를 붙여넣어야 하므로 주의하세요.
<?php if (have_posts()) : ?>
<?php $count = 0; ?>
<?php while (have_posts()) : the_post(); ?>
<?php $count++; ?>
  <?php if ($count == 2) : ?>
          //Insert the code of an ad in this line
          <h2><a href="<?php the_permalink(); ?>"><?php the_title(); ?></a></h2>
          <?php the_excerpt(); ?>
   <?php else : ?>
          <h2><a href="<?php the_permalink(); ?>"><?php the_title(); ?></a></h2>
          <?php the_excerpt(); ?>
  <?php endif; ?>
<?php endwhile; ?>
<?php endif; ?>
#2. 오래되었지만 인기 있는 1년 된 게시물 표시

블로그의 일부 게시물은 1년 전에 작성되었지만 여전히 독자들 사이에서 인기가 있을 수 있습니다. 예를 들어 방법 문서나 다른 종류의 상시 콘텐츠가 될 수 있습니다. 이 게시물이 인기를 유지하려면 이 편리한 해킹을 적용할 수 있습니다.
이 코드를 single.php 파일에 삽입하십시오.
<?php
$current_day = date('j');
$last_year = date('Y')-1;
query_posts('day='.$current_day.'&year='.$last_year);
if (have_posts()):
    while (have_posts()) : the_post();
       the_title();
       the_excerpt();
    endwhile;
endif;
?>
#삼. 루프에 5개의 최신 고정 게시물 표시
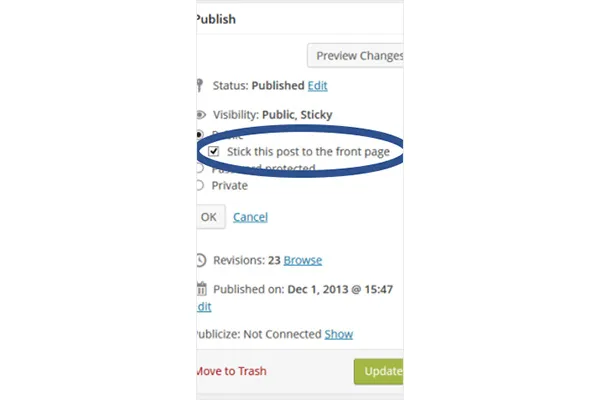
기본 기능을 사용하면 하나의 게시물을 첫 페이지에 붙일 수 있습니다. 아래의 해킹은 5개의 고정 게시물을 배치합니다.
많은 블로거는 항목이 다른 항목 위에 표시되도록 하기 때문에 고정 게시물을 추천 게시물로 생각합니다. 자신만의 "Editor's Picks" 카테고리를 만들고 싶다면 이를 위한 해킹 방법이 있습니다. 아래 코드는 테마의 아무 곳에나 삽입해야 작동합니다. 네 번째 줄의 숫자를 바꿔서 더 적은 게시물을 표시하도록 숫자를 변경할 수도 있습니다.
<?php
$sticky = get_option('sticky_posts');
rsort( $sticky );
$sticky = array_slice( $sticky, 0, 5);
query_posts( array( 'post__in' => $sticky, 'caller_get_posts' => 1 ) );

if (have_posts()) :
    while (have_posts()) : the_post();
        the_title();
        the_excerpt();
    endwhile;
endif;

?>
#4. 특정 카테고리의 게시물 나열
아래 해킹으로 같은 카테고리의 게시물을 구별하십시오.
어떤 이유로 같은 범주를 공유하는 게시물을 구분해야 하는 경우(예: 에세이 작성자를 위한 방법 기사) 루프 파일에 다음 코드를 삽입합니다.
<?php foreach((get_the_category()) as $category) {
      	$thecat = $category->cat_ID . ' ';
    	query_posts('child_of='.$thecat);
 if (have_posts()) : while (have_posts()) : the_post();
    //Classic WP loop
 endwhile;endif;
?>
#5. 향후 게시물 목록 제공
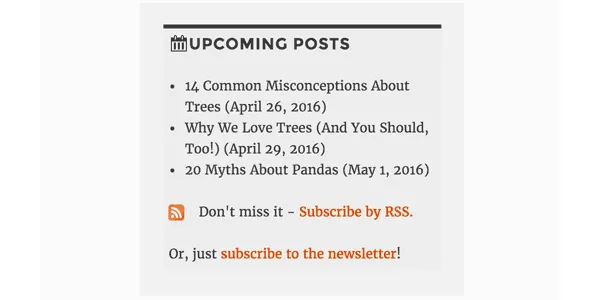
독자에게 다가오는 게시물에 대해 알려주면 관심을 불러일으키고 블로그를 다시 방문하여 읽을 수 있습니다. 이것이 좋은 생각처럼 들리면 아래 코드를 사용하여 WordPress 사이트에 예정된 게시물의 짧은 목록을 제공하십시오.
<?php query_posts('showposts=10&post_status=future'); ?>
<?php if ( have_posts() ) : while ( have_posts() ) : the_post(); ?>
    <h2><?php the_title(); ?></h2>
    <span class="datetime"><?php the_time('j. F Y'); ?></span></p>
<?php endwhile;
else: ?><p>No future events scheduled.</p>
<?php endif; ?>
#6. 특정 날짜에 업로드된 게시물 가져오기
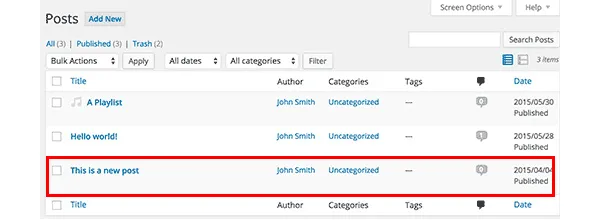
피드에서 게시물을 찾는 데 자주 어려움을 겪는다면 루프를 사용하여 게시물을 검색할 수 있습니다. 검색을 정말 쉽게 만드는 다음 코드를 삽입하면 가능합니다. 특히, 사용자가 지정한 두 날짜 사이에 게시된 항목을 검색합니다.
<?php
  function filter_where($where = '') {
        $where .= " AND post_date >= '2012-08-19' AND post_date <= '2012-08-11'";
    return $where;
  }
add_filter('posts_where', 'filter_where');
query_posts($query_string);
while (have_posts()) :
      the_post();
      the_content();
endwhile;

?>
#7. 이미지 루프 표시
대부분의 사람들이 비주얼을 높이 평가하기 때문에 WordPress 웹사이트의 시작 페이지에 있는 이미지 갤러리는 좋은 생각입니다. 게시물에 리드 이미지가 포함된 경우 아래 코드는 루프에서 보여주기 위해 해당 이미지를 검색합니다.
다음 코드를 functions.php 파일에 삽입하십시오.
function catch_that_image() {
  global $post, $posts;
  $first_img = '';
  ob_start();
  ob_end_clean();
  $output = preg_match_all('/<img.+src=['"]([^'"]+)['"].*>/i', $post->post_content, $matches);
  $first_img = $matches [1] [0];

  if(empty($first_img)){ //Determines a default image
    $first_img = "/images/default.jpg";
  }
  return $first_img;
}
#8. 만료 날짜를 설정하여 자동으로 게시물 제거
블로그의 독자층을 늘리기 위해 콘테스트를 진행한다고 가정해 보겠습니다. 콘테스트가 끝나면 결과를 발표하고 가장 중요한 것은 그에 대한 답변이나 힌트, 단서를 게시합니다. 물론 독자들이 영원히 접근할 수 없어야 하는 것은 아닙니다. 나중에 또 다른 대회를 진행할 수 있기 때문입니다. 그렇죠?
잊어버린 게시물을 제거하는 좋은 방법은 만료 날짜를 설정하여 예약하는 것입니다. 아래 루프는 기존 루프를 대체하고 바로 수행합니다.
만료 시간을 대체하기 위해 mm/dd/yyyy 00:00:00 형식을 사용하는 것을 잊지 마십시오.
<?php
if (have_posts()) :
while (have_posts()) : the_post(); ?>
$expirationtime = get_post_custom_values('expiration');
if (is_array($expirationtime)) {
$expirestring = implode($expirationtime);
}

$secondsbetween = strtotime($expirestring)-time();
if ( $secondsbetween > 0 ) {
// For example…
the_title();
the_excerpt();
}
endwhile;
endif;
?>
#9. 트랙백에서 주석 분리

귀하의 블로그에서 인기 있는 항목은 다른 많은 사이트에서 링크됩니다. 독자가 댓글 섹션의 토론을 편안하게 따를 수 있도록 댓글과 트랙백을 분리해야 합니다.
comment.php를 열고 다음을 찾기만 하면 됩니다.
foreach ($comments as $comment) : ?>
// Comments are displayed here
endforeach;
그것을 발견? 좋습니다. 이제 새 코드로 바꾸십시오.
<ul class="commentlist">
<?php //Displays comments only
foreach ($comments as $comment) : ?>
<?php $comment_type = get_comment_type(); ?>
<?php if($comment_type == 'comment') { ?>
<li>//Comment code goes here</li>
<?php }
endforeach;
</ul>

<ul>
<?php //Displays trackbacks only
foreach ($comments as $comment) : ?>
<?php $comment_type = get_comment_type(); ?>
<?php if($comment_type != 'comment') { ?>
<li><?php comment_author_link() ?></li>
<?php }
endforeach;

</ul>
#10. 관련 게시물 표시

관련 게시물을 표시하는 것은 독자층을 늘리는 좋은 방법입니다. 특별한 코드를 single.php 파일에 붙여넣기만 하면 됩니다.

<?php
  $backup = $post;  // backup the current object
  $tags = ks29so_get_post_tags($post->ID);
  $tagIDs = array();
  if ($tags) {
    $tagcount = count($tags);
    for ($i = 0; $i < $tagcount; $i++) {
      $tagIDs[$i] = $tags[$i]->term_id;
    }
    $args=array(
      'tag__in' => $tagIDs,
      'post__not_in' => array($post->ID),
      'showposts'=>5,
      'caller_get_posts'=>1
    );
    $my_query = new WP_Query($args);
    if( $my_query->have_posts() ) {
      while ($my_query->have_posts()) : $my_query->the_post(); ?>
        <h3><a href="<?php the_permalink() ?>" rel="bookmark" title="<?php the_title(); ?>"><?php the_title(); ?></a></h3>
      <?php endwhile;
    } else { ?>
      <h2>No related posts found!</h2>
    <?php }
  }
  $post = $backup;  // copy it back
  ks29so_reset_query(); // to use the original query again
?>
#11. 특정 게시물이 홈페이지에 표시되는 방식 결정
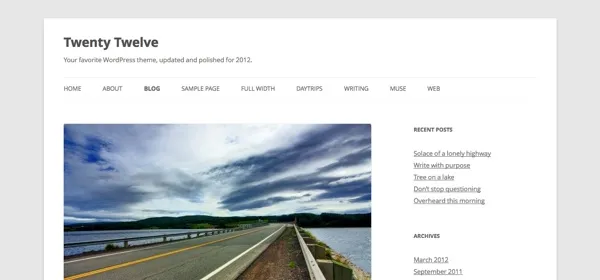
대다수의 WordPress 테마는 시작 페이지에 모든 게시물을 동일한 방식으로 표시합니다. 그러나 마음에 들지 않으면 변경하여 전체를 표시해야 하는 항목과 일부만 발췌하여 표시할 항목을 정의할 수 있습니다.
index.php 파일을 찾아 루프를 찾으십시오. 다음 코드가 이를 대체합니다.
<?php if (have_posts()) :
    while (have_posts()) : the_post();
         $customField = get_post_custom_values("full");
         if (isset($customField[0])) {
             //Custom field is set, display a full post
              the_title();
              the_content();
         } else {
             // No custom field set, lets display an excerpt
              the_title();
              the_excerpt();
    endwhile;
endif;
?>
#12. 홈페이지 게시물 위에 판촉 콘텐츠 표시
index.php 파일에 다음 코드를 삽입하여 프로모션 콘텐츠를 추가합니다.
<div class="content-loop">
#13. 페이지에 블로그의 모든 작성자 나열

루프의 아무 곳에나 이 코드를 붙여넣으면 모든 작성자의 목록이 표시됩니다.
<ul>
<?php ks29so_list_authors('exclude_admin=0&optioncount=1&show_fullname=1&hide_empty=1'); ?>
</ul>
#14. 사용자 정의 필드를 사용하여 게스트 작성자 이름 표시
블로그에서 게스트 작성자를 사용하는 경우 별도의 페이지를 만들지 않을 가능성이 큽니다. 대신 이름을 표시하지 않는 이유는 무엇입니까?
이 코드를 single.php에 삽입하여 수행하십시오.
<?php $author = get_post_meta($post->ID, "guest-author", true);
if ($author != "") {
echo $author;
} else {
the_author();
} ?>
#15. 이미지를 게시에 대한 필수 요구 사항으로 만들기
이미지가 있는 게시물은 그렇지 않은 게시물보다 조회수가 더 많습니다. functions.php 파일을 열어 필수 항목으로 만드십시오.
add_action('save_post', 'wpds_check_thumbnail');
add_action('admin_notices', 'wpds_thumbnail_error');

function wpds_check_thumbnail( $post_id ) {
 // change to any custom post type
  if( get_post_type($post_id) != 'post' )
      return;

  if ( ! has_post_thumbnail( $post_id ) ) {
   // set a transient to show the users an admin message
    set_transient( "has_post_thumbnail", "no" );
   // unhook this function so it doesn't loop infinitely
    remove_action('save_post', 'wpds_check_thumbnail');
   // update the post set it to draft
    ks29so_update_post(array('ID' => $post_id, 'post_status' => 'draft'));

    add_action('save_post', 'wpds_check_thumbnail');
  } else {
    delete_transient( "has_post_thumbnail" );
  }
}

function wpds_thumbnail_error() {
 // check if the transient is set, and display the error message
  if ( get_transient( "has_post_thumbnail" ) == "no" ) {
    echo "<div class='error'><p><strong>You must add a Featured Image before publishing this. Don't panic, your post is saved.</strong></p></div>";
    delete_transient( "has_post_thumbnail" );
  }
}
#16. 등록 후 특정 페이지로 이동
functions.php 파일을 열고 아래 코드를 추가합니다.
function __my_registration_redirect(){
    return home_url( '/my-page' );
}
add_filter( 'registration_redirect', '__my_registration_redirect' );

#17. Insert Ads in Post
Use this code in your functions.php file to wrap ads in a post in any place you want.
Hack
function googleadsense($content){
  $adsensecode = 'Your Ad Codes Here';
  $pattern = '<!-googlead->';
  $content = str_replace($pattern, $adsensecode, $content);
  return $content;
}
add_filter('the_content', 'googleadsense');
#18. 단축 코드를 사용하여 광고 표시
광고를 삽입할 위치를 선택하고 다음 코드를 functions.php에 붙여넣습니다.
function showads() {
    return '
AD’S CODE HERE
';
}
add_shortcode('adsense', 'showads');
#19. 가장 많이 댓글이 달린 게시물 표시

다음 코드를 functions.php 파일에 추가하여 댓글이 가장 많은 게시물을 표시합니다.
function wpb_most_commented_posts() {
ob_start();?>
<ul class="most-commented">
<?php
$query = new
WP_Query('orderby=comment_count&posts_per_page=10');
while($query->have_posts()) : $query->the_post(); ?>
<li><a href="<?php the_permalink(); ?>" title="<?php the_title(); ?>"><?php the_title(); ?></a> <span class="wpb-comment-count"><?php comments_popup_link('No Comments;', '1 Comment', '% Comments'); ?></span></li>
<?php endwhile; ?>
</ul>
<?php// Turn off output buffering
$output = ob_get_clean();
return $output; }
add_shortcode('wpb_most_commented', 'wpb_most_commented_posts');
add_filter('widget_text', 'do_shortcode');
#20. 추천 이미지 지원 활성화
대다수의 워드프레스 테마는 추천 이미지를 지원하지만, 지원하지 않는 경우 functions.php 파일에 삽입하여 활성화할 수 있습니다.
add_theme_support( 'post-thumbnails' );
#21. 최신 댓글 표시
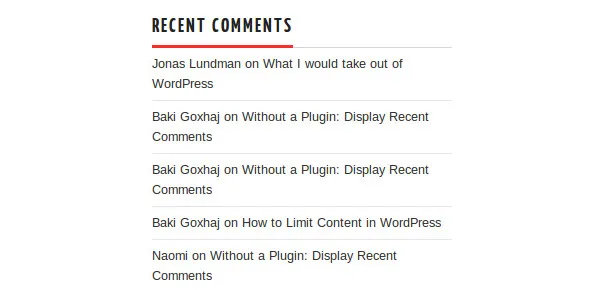
루프의 아무 곳에서나 이 코드를 사용하여 5개의 최신 주석을 표시합니다.
<?php
$query = "SELECT * from $wpdb->comments WHERE comment_approved= '1'
ORDER BY comment_date DESC LIMIT 0 ,5";
$comments = $wpdb->get_results($query);
if ($comments) {
echo '<ul>';
foreach ($comments as $comment) {
$url = '<a href="'. get_permalink($comment->comment_post_ID).'#comment-'.$comment->comment_ID .'" title="'.$comment->comment_author .' | '.get_the_title($comment->comment_post_ID).'">';
echo '<li>';
echo '<div class="img">';
echo $url;
echo get_avatar( $comment->comment_author_email, $img_w);
echo '</a></div>';
echo '<div class="txt">Par: ';
echo $url;
echo $comment->comment_author;
echo '</a></div>';
echo '</li>';
}
echo '</ul>';
}
?>
해킹할 준비가 되셨나요?
이 편리한 조정을 사용하여 WordPress 사이트의 기능을 향상시키십시오!
