20以上の最も望まれるWordPressループハック
公開: 2017-12-20ループはWordPressのメインプロセスであるため、ほとんどすべてのテーマファイルにあります。 基本的に、これは、テーマのテンプレートファイルを介して投稿を表示するためにプラットフォームで使用されるPHPコードです。 言い換えれば、それは巨大です。 実際、サイトはループなしでは機能しないため、これは非常に重要です。
この信じられないほど強力な機能のセットを微調整すると、WordPressサイトの機能が向上する可能性があります。 たとえば、ホームページでの投稿の表示方法を変更し、特定のパラメーターを使用して投稿を並べ替えることができます。 ループを変更するのが最も簡単なことを考えると、かなり印象的で創造的なハックを得ることができます。
プラグインをインストールせずに、それを実現するために今すぐ使用する必要がある20以上のループハックを紹介しましょう。
#1。 最初の投稿の後に広告を配置する
ブロガーとして、あなたは広告がお金を稼ぐための最良の方法の1つであることをよく知っています。 訪問者からこれらの非常に必要なクリックを取得することは確かにトリッキーなことであり、多くのブロガーは高いクリック率を楽しんでいません。 最初の投稿の後に広告を配置することは、広告を増やす良い方法である可能性があるため、この簡単な調整を試してください。
ループを次のループに置き換えます。 広告のコードをそこに貼り付ける必要があるため、注意してください。
<?php if (have_posts()) : ?>
<?php $count = 0; ?>
<?php while (have_posts()) : the_post(); ?>
<?php $count++; ?>
  <?php if ($count == 2) : ?>
          //Insert the code of an ad in this line
          <h2><a href="<?php the_permalink(); ?>"><?php the_title(); ?></a></h2>
          <?php the_excerpt(); ?>
   <?php else : ?>
          <h2><a href="<?php the_permalink(); ?>"><?php the_title(); ?></a></h2>
          <?php the_excerpt(); ?>
  <?php endif; ?>
<?php endwhile; ?>
<?php endif; ?>
#2。 古いが人気のある1年前の投稿を表示する

ブログの投稿の中には、1年前に作成されたものもありますが、それでも読者の間で人気がある可能性があります。 たとえば、ハウツー記事やその他の種類の常緑のコンテンツである可能性があります。 これらの投稿の人気を維持するために、この便利なハックを適用できます。
このコードをsingle.phpファイルに挿入します。
<?php
$current_day = date('j');
$last_year = date('Y')-1;
query_posts('day='.$current_day.'&year='.$last_year);
if (have_posts()):
    while (have_posts()) : the_post();
       the_title();
       the_excerpt();
    endwhile;
endif;
?>
#3。 ループ内の5つの最新のスティッキー投稿を表示する
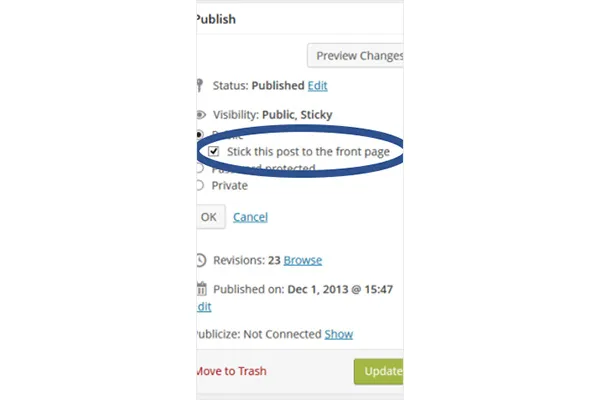
デフォルトの機能では、1つの投稿をフロントページに貼り付けることができます。 以下のハックは、5つのスティッキーポストを配置します。
多くのブロガーは、エントリを他の投稿の上に表示できるため、スティッキー投稿を注目の投稿と見なしています。 独自の「編集者のおすすめ」カテゴリを作成したい場合は、そのためのハックがあります。 以下のコードを機能させるには、テーマの任意の場所に挿入する必要があります。 4行目の番号を置き換えることで、投稿数を変更して投稿数を減らすこともできます。
<?php
$sticky = get_option('sticky_posts');
rsort( $sticky );
$sticky = array_slice( $sticky, 0, 5);
query_posts( array( 'post__in' => $sticky, 'caller_get_posts' => 1 ) );

if (have_posts()) :
    while (have_posts()) : the_post();
        the_title();
        the_excerpt();
    endwhile;
endif;

?>
#4。 特定のカテゴリからの投稿を一覧表示する
以下のハックで同じカテゴリの投稿を区別します。
何らかの理由で同じカテゴリを共有する投稿を区別する必要がある場合(たとえば、エッセイライター向けのハウツー記事)、次のコードをループファイルに挿入します。
<?php foreach((get_the_category()) as $category) {
      	$thecat = $category->cat_ID . ' ';
    	query_posts('child_of='.$thecat);
 if (have_posts()) : while (have_posts()) : the_post();
    //Classic WP loop
 endwhile;endif;
?>
#5。 将来の投稿のリストを提供する
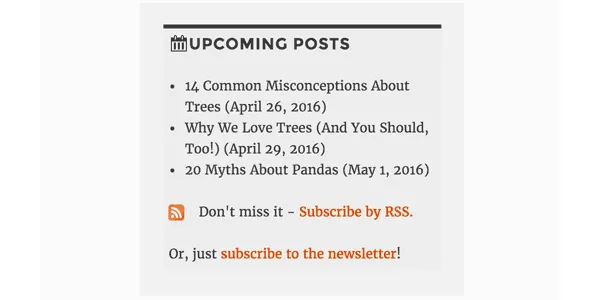
今後の投稿について読者に知らせることは、彼らの興味を刺激し、彼らをあなたのブログに戻してそれらを読むようにさせるかもしれません。 これがあなたにとって素晴らしいアイデアのように思える場合は、以下のコードを使用して、WordPressサイトの今後の投稿の短いリストを提供してください。
<?php query_posts('showposts=10&post_status=future'); ?>
<?php if ( have_posts() ) : while ( have_posts() ) : the_post(); ?>
    <h2><?php the_title(); ?></h2>
    <span class="datetime"><?php the_time('j. F Y'); ?></span></p>
<?php endwhile;
else: ?><p>No future events scheduled.</p>
<?php endif; ?>
#6。 特定の日にアップロードされた投稿を取得する
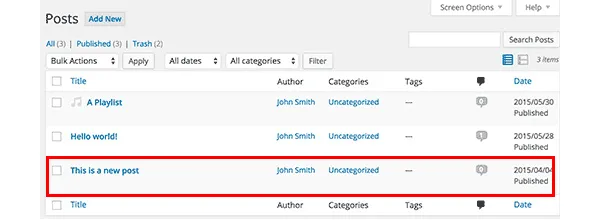
フィード内の投稿を見つけるのに苦労することが多い場合は、ループを使用してそれらを検索できます。 以下のコードを挿入することで、検索がとても簡単になります。 具体的には、自分で指定した2つの日付の間に投稿されたエントリを取得します。
<?php
  function filter_where($where = '') {
        $where .= " AND post_date >= '2012-08-19' AND post_date <= '2012-08-11'";
    return $where;
  }
add_filter('posts_where', 'filter_where');
query_posts($query_string);
while (have_posts()) :
      the_post();
      the_content();
endwhile;

?>
#7。 画像のループを表示する
WordPress Webサイトの開始ページにある画像のギャラリーは、ほとんどの人がビジュアルを高く評価しているため、良いアイデアです。 投稿にリード画像が含まれている場合、以下のコードはそれらを取得してループで紹介します。
次のコードをfunctions.phpファイルに挿入します。
function catch_that_image() {
  global $post, $posts;
  $first_img = '';
  ob_start();
  ob_end_clean();
  $output = preg_match_all('/<img.+src=['"]([^'"]+)['"].*>/i', $post->post_content, $matches);
  $first_img = $matches [1] [0];

  if(empty($first_img)){ //Determines a default image
    $first_img = "/images/default.jpg";
  }
  return $first_img;
}
#8。 有効期限を設定して投稿を自動的に削除する
ブログの読者数を増やすためにコンテストを実行しているとします。 コンテストが終了したら、結果を公開します。最も重要なのは、回答またはヒント、およびそれらへの手がかりを公開することです。 もちろん、将来別のコンテストを実行する可能性があるため、読者が永久にアクセスできるようにするべきではありません。
投稿を忘れた場合でも削除する良い方法は、有効期限を設定して投稿をスケジュールすることです。 以下のループは、既存のループを置き換えて、まさにそれを実行します。
有効期限の代わりにmm/dd /yyyy00:00:00形式を使用することを忘れないでください。
<?php
if (have_posts()) :
while (have_posts()) : the_post(); ?>
$expirationtime = get_post_custom_values('expiration');
if (is_array($expirationtime)) {
$expirestring = implode($expirationtime);
}

$secondsbetween = strtotime($expirestring)-time();
if ( $secondsbetween > 0 ) {
// For example…
the_title();
the_excerpt();
}
endwhile;
endif;
?>
#9。 トラックバックからコメントを分離する

あなたのブログの人気のあるエントリは、他の多くのサイトからリンクされます。 読者がコメントセクションのディスカッションを快適にフォローできるようにするには、コメントとトラックバックを分離する必要があります。
あなたがしなければならないのはcomments.phpを開いて、以下を探すことです:
foreach ($comments as $comment) : ?>
// Comments are displayed here
endforeach;
それを見つけた? これで、新しいコードに置き換えてください。
<ul class="commentlist">
<?php //Displays comments only
foreach ($comments as $comment) : ?>
<?php $comment_type = get_comment_type(); ?>
<?php if($comment_type == 'comment') { ?>
<li>//Comment code goes here</li>
<?php }
endforeach;
</ul>

<ul>
<?php //Displays trackbacks only
foreach ($comments as $comment) : ?>
<?php $comment_type = get_comment_type(); ?>
<?php if($comment_type != 'comment') { ?>
<li><?php comment_author_link() ?></li>
<?php }
endforeach;

</ul>
#10。 関連記事を表示

関連する投稿を表示することは、読者を増やす良い方法です。 それを達成するためにあなたがしなければならないのは、single.phpファイルに特別なコードを貼り付けることです。

<?php
  $backup = $post;  // backup the current object
  $tags = ks29so_get_post_tags($post->ID);
  $tagIDs = array();
  if ($tags) {
    $tagcount = count($tags);
    for ($i = 0; $i < $tagcount; $i++) {
      $tagIDs[$i] = $tags[$i]->term_id;
    }
    $args=array(
      'tag__in' => $tagIDs,
      'post__not_in' => array($post->ID),
      'showposts'=>5,
      'caller_get_posts'=>1
    );
    $my_query = new WP_Query($args);
    if( $my_query->have_posts() ) {
      while ($my_query->have_posts()) : $my_query->the_post(); ?>
        <h3><a href="<?php the_permalink() ?>" rel="bookmark" title="<?php the_title(); ?>"><?php the_title(); ?></a></h3>
      <?php endwhile;
    } else { ?>
      <h2>No related posts found!</h2>
    <?php }
  }
  $post = $backup;  // copy it back
  ks29so_reset_query(); // to use the original query again
?>
#11。 特定の投稿がホームページにどのように表示されるかを決定する
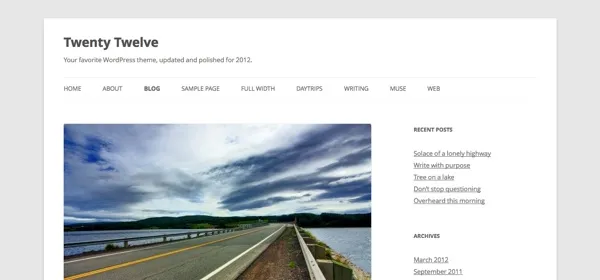
WordPressテーマの大部分は、開始ページにすべての投稿を同じように表示します。 ただし、気に入らない場合は、変更して、完全に表示する必要があるものと、抜粋だけで十分なものを定義できます。
index.phpファイルを見つけて、そこでループを探します。 次のコードがそれを置き換えます。
<?php if (have_posts()) :
    while (have_posts()) : the_post();
         $customField = get_post_custom_values("full");
         if (isset($customField[0])) {
             //Custom field is set, display a full post
              the_title();
              the_content();
         } else {
             // No custom field set, lets display an excerpt
              the_title();
              the_excerpt();
    endwhile;
endif;
?>
#12。 ホームページの投稿の上にプロモーションコンテンツを表示する
次のコードをindex.phpファイルに挿入して、プロモーションコンテンツを追加します。
<div class="content-loop">
#13。 ページ内のブログのすべての作成者を一覧表示します

このコードをループ内の任意の場所に貼り付けるだけで、すべての作成者のリストが表示されます。
<ul>
<?php ks29so_list_authors('exclude_admin=0&optioncount=1&show_fullname=1&hide_empty=1'); ?>
</ul>
#14。 カスタムフィールドを使用してゲスト作成者の名前を表示する
ブログでゲスト作成者を使用している場合は、ゲスト作成者用に別のページを作成しない可能性が非常に高くなります。 代わりに名前だけを表示しないのはなぜですか?
これを行うには、このコードをsingle.phpに挿入します。
<?php $author = get_post_meta($post->ID, "guest-author", true);
if ($author != "") {
echo $author;
} else {
the_author();
} ?>
#15。 画像を公開の必須要件にする
画像のある投稿は、画像のない投稿よりも多くのビューを楽しむことがよくあります。 関数.phpファイルを開いて必須にします。
add_action('save_post', 'wpds_check_thumbnail');
add_action('admin_notices', 'wpds_thumbnail_error');

function wpds_check_thumbnail( $post_id ) {
 // change to any custom post type
  if( get_post_type($post_id) != 'post' )
      return;

  if ( ! has_post_thumbnail( $post_id ) ) {
   // set a transient to show the users an admin message
    set_transient( "has_post_thumbnail", "no" );
   // unhook this function so it doesn't loop infinitely
    remove_action('save_post', 'wpds_check_thumbnail');
   // update the post set it to draft
    ks29so_update_post(array('ID' => $post_id, 'post_status' => 'draft'));

    add_action('save_post', 'wpds_check_thumbnail');
  } else {
    delete_transient( "has_post_thumbnail" );
  }
}

function wpds_thumbnail_error() {
 // check if the transient is set, and display the error message
  if ( get_transient( "has_post_thumbnail" ) == "no" ) {
    echo "<div class='error'><p><strong>You must add a Featured Image before publishing this. Don't panic, your post is saved.</strong></p></div>";
    delete_transient( "has_post_thumbnail" );
  }
}
#16。 登録後に特定のページにリダイレクトする
Functions.phpファイルを開き、以下のコードを追加します。
function __my_registration_redirect(){
    return home_url( '/my-page' );
}
add_filter( 'registration_redirect', '__my_registration_redirect' );

#17. Insert Ads in Post
Use this code in your functions.php file to wrap ads in a post in any place you want.
Hack
function googleadsense($content){
  $adsensecode = 'Your Ad Codes Here';
  $pattern = '<!-googlead->';
  $content = str_replace($pattern, $adsensecode, $content);
  return $content;
}
add_filter('the_content', 'googleadsense');
#18。 ショートコードを使用して広告を表示する
広告を挿入する場所を選択し、次のコードをfunctions.phpに貼り付けます。
function showads() {
    return '
AD’S CODE HERE
';
}
add_shortcode('adsense', 'showads');
#19。 コメントの多い投稿を表示する

次のコードをfunctions.phpファイルに追加して、コメントが最も多い投稿を表示します。
function wpb_most_commented_posts() {
ob_start();?>
<ul class="most-commented">
<?php
$query = new
WP_Query('orderby=comment_count&posts_per_page=10');
while($query->have_posts()) : $query->the_post(); ?>
<li><a href="<?php the_permalink(); ?>" title="<?php the_title(); ?>"><?php the_title(); ?></a> <span class="wpb-comment-count"><?php comments_popup_link('No Comments;', '1 Comment', '% Comments'); ?></span></li>
<?php endwhile; ?>
</ul>
<?php// Turn off output buffering
$output = ob_get_clean();
return $output; }
add_shortcode('wpb_most_commented', 'wpb_most_commented_posts');
add_filter('widget_text', 'do_shortcode');
#20。 注目の画像サポートを有効にする
WordPressテーマの大部分は注目の画像をサポートしていますが、サポートしていない場合は、functions.phpファイルに挿入することで有効にできます。
add_theme_support( 'post-thumbnails' );
#21。 最新のコメントを表示
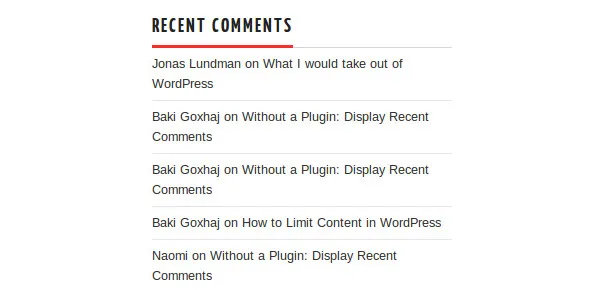
このコードをループ内の任意の場所で使用して、5つの最新のコメントを表示します。
<?php
$query = "SELECT * from $wpdb->comments WHERE comment_approved= '1'
ORDER BY comment_date DESC LIMIT 0 ,5";
$comments = $wpdb->get_results($query);
if ($comments) {
echo '<ul>';
foreach ($comments as $comment) {
$url = '<a href="'. get_permalink($comment->comment_post_ID).'#comment-'.$comment->comment_ID .'" title="'.$comment->comment_author .' | '.get_the_title($comment->comment_post_ID).'">';
echo '<li>';
echo '<div class="img">';
echo $url;
echo get_avatar( $comment->comment_author_email, $img_w);
echo '</a></div>';
echo '<div class="txt">Par: ';
echo $url;
echo $comment->comment_author;
echo '</a></div>';
echo '</li>';
}
echo '</ul>';
}
?>
ハックする準備はできましたか?
これらの便利な調整を使用して、WordPressサイトの機能を強化してください!
